Common workflows
These walkthroughs show how Care Panel features work together for two common scenarios. Each step links to the relevant documentation page if you need more detail.
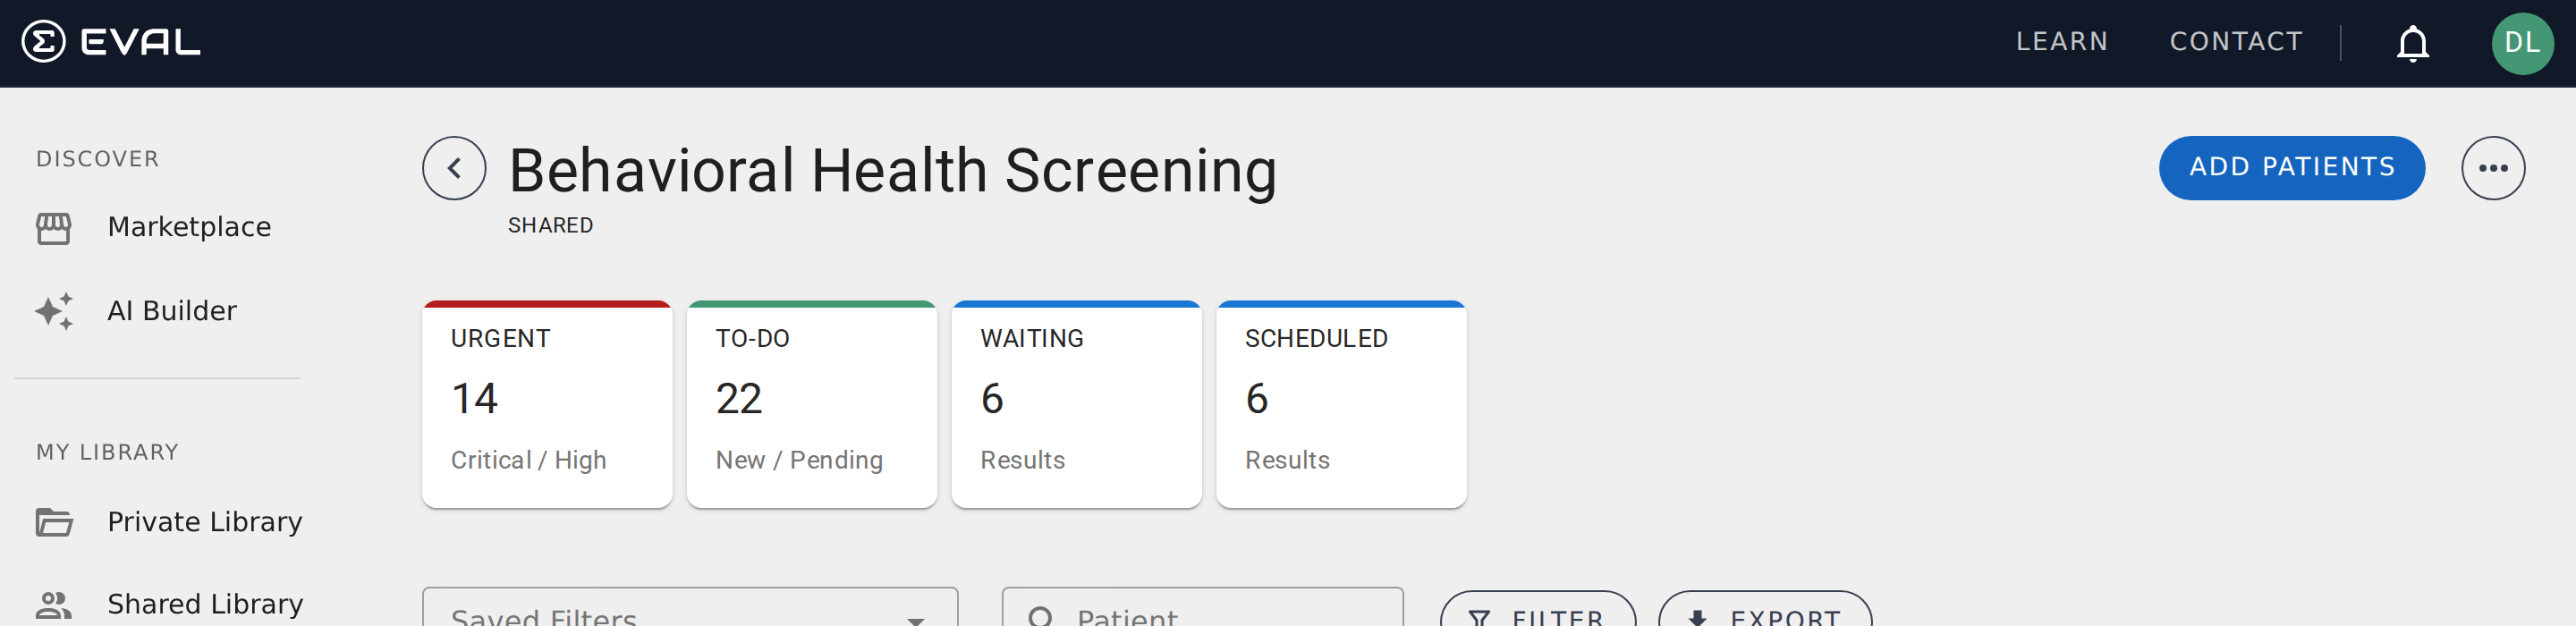
Clinical screening
This workflow is for a clinical team that wants to monitor a population of patients with recurring assessments — for example, a behavioral health program using the PHQ-9 to screen for depression.
Create the panel
Go to Care Panels in the sidebar and click New Panel. Name it after your program (e.g., "Behavioral Health Screening") and set visibility to Shared so your clinical team can access it. If your program focuses on a specific evaluation, set it as the default evaluation so the Results tab only shows relevant scores.
→ Creating and configuring panels
Add your roster
Open the Patients tab and click Add Patients. Search for existing patients in your account and add them to the panel. If patients aren't in the system yet, create new records or import them from your EHR.
Schedule assessments
For each patient (or a group of patients), set up a recurring schedule. A typical behavioral health setup might be a weekly PHQ-9 sent every Monday morning via email. Choose the frequency, set the repeat interval, and pick the communication method that works best for your population.
For ongoing monitoring, set the end condition to Never. You can always archive individual schedules when a patient completes their program.
Set up notifications
Create notification rules so your team doesn't have to manually check the panel throughout the day. At minimum, set up a rule that emails your team lead whenever a Critical or Urgent result with New status arrives. You can add more granular rules — for example, notifying a specific physician when results are assigned to their review stage.
Daily triage workflow
Create assignments that match your clinical process — Nurse Triage, Physician Review, and Resolved, for example. Then create saved filters for each stage so team members can jump directly to their queue.
Your daily routine becomes: open the panel, click your saved filter, review and triage your results, and move them to the next stage.
→ Filtering and exporting data
Research cohort
This workflow is for a research team managing a study with enrolled participants, a defined assessment protocol, and data export needs.
Create a private panel
Go to Care Panels and click New Panel. Name it after your study (e.g., "Anxiety Intervention Study — Spring 2026") and set visibility to Private to restrict access to your research team. Add your research coordinators as Owners so they can manage the panel.
→ Creating and configuring panels
Enroll participants
Instead of manually adding each participant, create a public intake linked to your study's intake form or baseline assessment. Share the link with potential participants — via email recruitment, your study website, or printed flyers with a QR code.
When participants complete the intake, they're automatically added to the panel as patients. Their baseline data is captured as the first result in the panel.
→ Collecting responses with public intakes
Assessment protocol
For each enrolled participant, set up a recurring schedule that matches your study protocol. If your study requires weekly assessments for 12 weeks, configure the schedule with a weekly repeat and set the end condition to After 12 results.
Use the patient instructions field to give participants context for each assessment — for example, "Please rate your symptoms over the past 7 days."
Track completion
Use the Schedule tab to monitor adherence. The Received column shows how many assessments each participant has completed versus how many are expected. The Scheduled summary card at the top tells you how many active schedules are running. If a participant misses an assessment window, you can use the skip option to advance their schedule without waiting indefinitely.
Export for analysis
When you're ready to analyze your results, apply any relevant filters and click Export. You'll get an Excel file with one worksheet per evaluation, including all question responses and computed scores.
If you need to export regularly — for interim analyses or DSMB reports — create a saved filter with the exact criteria you need, apply it before each export, and you'll get a consistent dataset every time.
→ Filtering and exporting data
Waiting room screening
This workflow is for a clinic that wants to collect patient-reported assessments during check-in — without manually creating accounts or sending invitations.
Create a panel with a public intake
Go to Care Panels and click New Panel. Name it after your screening program (e.g., "Waiting Room PHQ-9") and set visibility to Shared. Set the PHQ-9 (or your screening evaluation) as the default evaluation.
Then open the overflow menu and select Public Intakes. Create a new intake linked to your screening evaluation. Copy the QR code — you'll print this for your waiting area.
→ Collecting responses with public intakes
Set up the physical workflow
Print the QR code on a card, poster, or check-in sheet. When a patient arrives, they scan the code with their phone, complete the screening, and submit. The result lands in your panel immediately — no login or account creation needed. If the evaluation includes name and date of birth questions, EVAL matches the result to an existing patient record or creates a new one.
Triage incoming results
As patients complete screenings throughout the day, results appear in real time. Set up a notification rule to email your triage nurse whenever a Critical or Urgent result arrives with New status. The nurse can triage between patients, clicking the Urgent summary card to see only the results that need immediate attention.
End-of-day review
At the end of each day, apply a saved filter showing all results from today with New status. Review any remaining results, update statuses, and export the day's data if needed for compliance reporting.