Managing patients
Every patient in EVAL starts as a record on the Patients page. Whether you're adding a new patient for a clinical encounter, creating test data for evaluation development, or importing demographics from your EHR, the process begins with the same search-first workflow that helps you avoid duplicates.
Creating a new patient
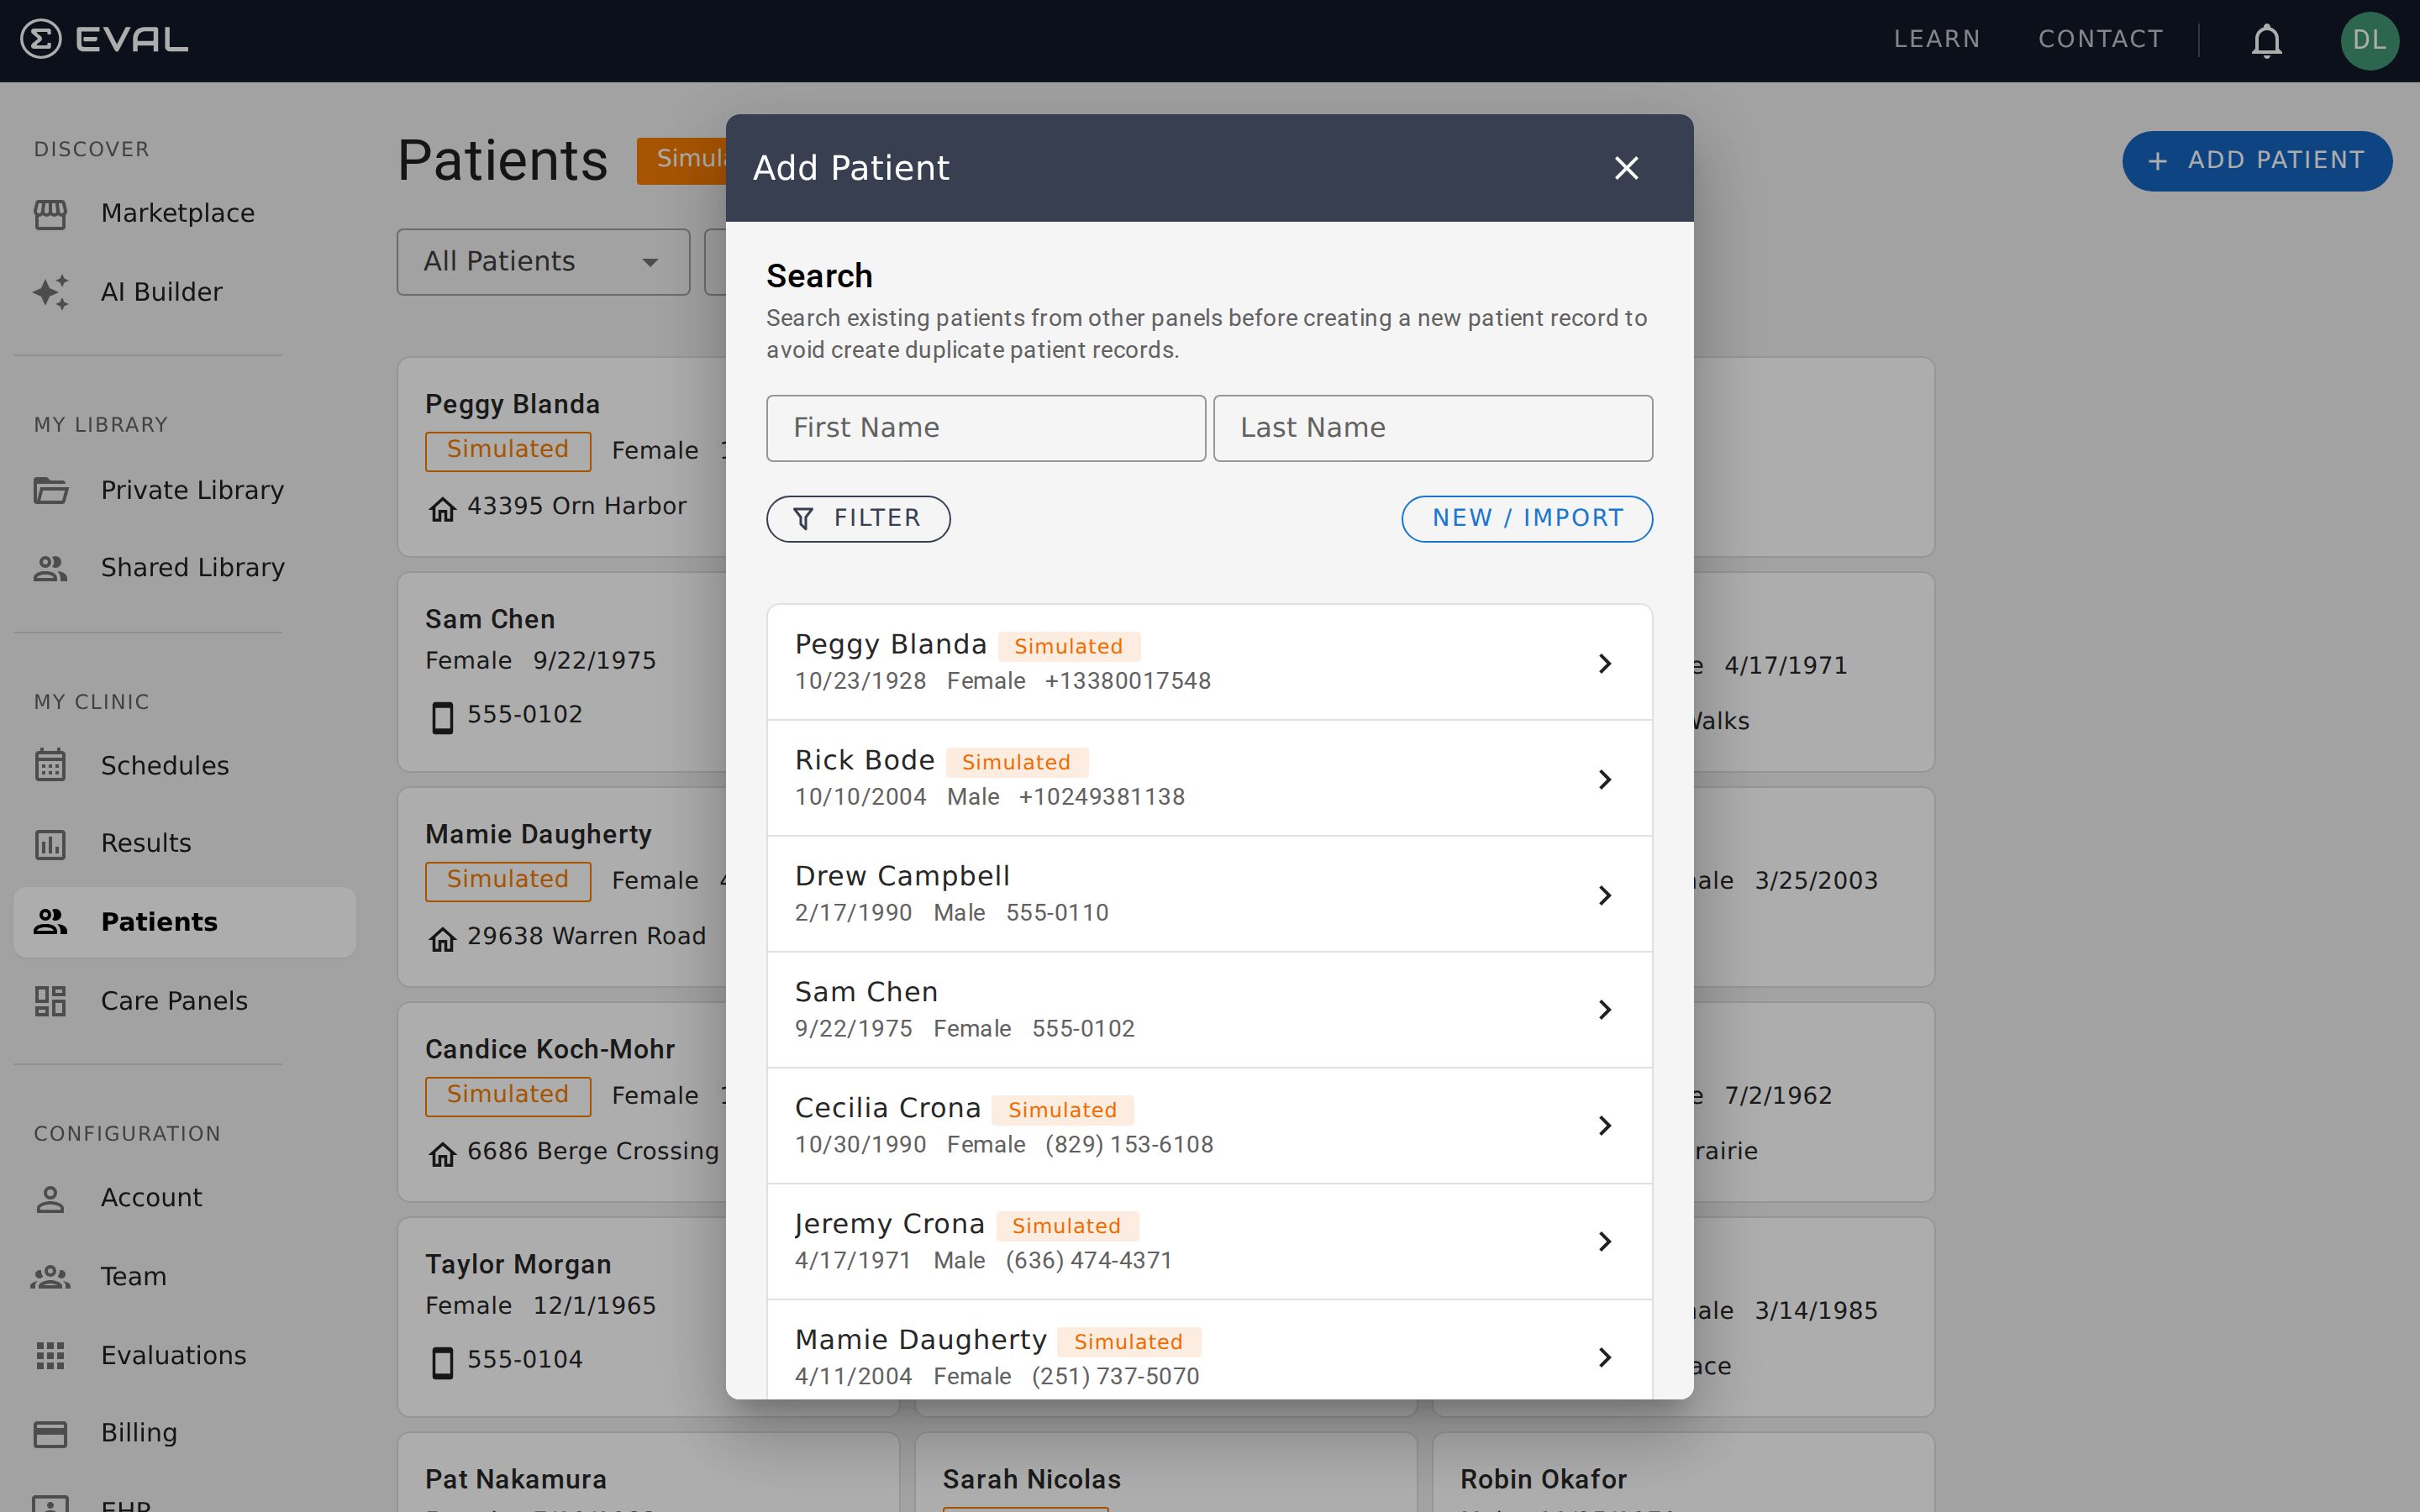
Click + Add Patient from the Patients page. Before you can create a new record, EVAL asks you to search your existing patients by first and last name. This step is intentional — duplicate patient records can fragment clinical data across multiple charts, making it difficult to get a complete picture of someone's assessment history.
If you find the patient you're looking for in the search results, click their name to open their chart directly. If they're not in the system yet, click New / Import to choose how you'd like to create their record.
Real patient records
Select New Patient Record to create a patient that will exist only in EVAL. You'll fill in:
- First Name and Last Name — required to identify the patient throughout the system
- Middle Name — optional, helpful when multiple patients share the same first and last name
- Birthdate — required, entered in MM/DD/YYYY format
- Gender — required, with options for Male, Female, Other, or Unknown
Click Create Patient to save the record. EVAL takes you to the patient's new chart, where you can immediately start adding results, medical information, and identity details.
Simulated patients
Select New Simulated Patient to create a test patient with automatically generated fictional data. Simulated patients require only two pieces of information:
- Age Range — choose from Infants, Children, Adolescents, Adults, or Older Adults
- Gender — same options as real patients
EVAL generates a fictional name, date of birth, and other demographics based on your selections. Simulated patients display an orange Simulated badge everywhere they appear — on the Patients page, in Care Panels, and in their chart header — so they're never mistaken for real patients.
Importing from your EHR
If your organization has connected an electronic health record system, a third option appears: Import from EHR. This pulls patient demographics directly from your EHR, saving you from manually re-entering information that already exists in another system.
The import flow works in three steps:
Search your EHR
Enter the patient's first name, last name, and date of birth. EVAL searches your connected EHR and returns matching records.
Select the right patient
Review the results and click the correct patient. Each result shows the patient's name, gender, date of birth, and medical record number (MRN) so you can confirm the match.
Confirm the import
EVAL creates a new patient record using the demographics from your EHR. The patient's chart opens automatically, ready for you to start adding evaluation results.
The import requires an active session with your EHR system. If you see a "Sign in required" message next to the EHR option, you'll need to authenticate with your EHR before importing. See EHR integrations for setup and authentication details.
Searching for patients
Quick search
The search bar at the top of the Patients page filters results as you type with a short delay. Enter part of a patient's first or last name, and matching records appear automatically. Clear the search field to return to the full patient list.
Search within the Add Patient dialog
The Add Patient dialog includes its own search with additional filtering capabilities. Beyond searching by first and last name, you can click the Filter button to narrow results by:
- Birthdate — match a specific date
- Age Range — filter to Infants, Children, Adolescents, Adults, or Older Adults
- Gender — filter to Male, Female, or Other
- Evaluations — find patients who have results for specific evaluations
These filters are especially useful when you're trying to determine whether a patient already exists before creating a new record. For instance, if two patients share the same name, filtering by birthdate helps you find the right one.
Patient cards
Each patient appears as a card showing their key identifying information at a glance:
- Name — the patient's full name (first, middle if available, and last)
- Gender and date of birth — displayed below the name
- Contact information — the first available piece of contact data: a street address, phone number, or email address
- Simulated badge — an orange label that appears on test patients
Click any card to navigate to the patient's full chart, where you can view their complete assessment history, medical information, and identity details.
Deleting a patient
Patient deletion in EVAL is a soft delete — the record isn't immediately removed. When a patient is deleted, they move from the All Patients view to the Deleted view and are scheduled for permanent deletion after a retention period.
While a patient is in the Deleted state, their chart is still accessible if you click their card in the Deleted view. A banner at the top of the chart shows the scheduled permanent deletion date and offers a Restore Patient button.
Restoring a deleted patient
To bring a deleted patient back, switch to the Deleted view using the dropdown at the top of the Patients page. Find the patient and click their card to open their chart. Click the Restore Patient button in the deletion banner at the top.
The patient immediately returns to the All Patients view and reappears in any Care Panels they were previously part of. Their results, schedules, and other data are fully restored to their pre-deletion state.
Merging patient records
When duplicate records exist for the same patient, EVAL can merge them into a single chart. After a merge, one record becomes the primary chart and the other is linked as a merged child. The merged record's data is preserved and accessible from the primary chart's Identity tab, where a Merged Records section displays the name, birth date, gender, and race of each merged record.
How EHR synchronization works
If your organization uses an EHR integration, understanding how EVAL keeps patient data synchronized helps you troubleshoot sync issues and set expectations with your clinical team.
What gets refreshed
An EHR chart refresh fetches the patient's complete FHIR profile from the connected EHR system. This includes demographics (name, birth date, gender), contact information, identifiers (MRNs), and the full medical record — allergies, diagnoses, imaging, labs, medications, procedures, and vitals. Each data category is fetched, compared with the existing EVAL record, and updated where changes are found.
When refreshes happen
Patient data can be refreshed in two ways. Scheduled refreshes run as a background process that periodically scans for patients due for an update and dispatches individual refresh jobs. On-demand refreshes are triggered from the patient's chart when a clinician wants the latest data immediately.
Rate limiting
To avoid overwhelming your EHR system, EVAL enforces per-instance rate limits on FHIR API calls. Each EHR vendor connection has a token bucket that controls how many concurrent requests can be made. If a refresh job can't acquire a rate limit token within 30 seconds, it's skipped and retried on the next scan cycle. This ensures your EHR stays responsive even when EVAL is synchronizing a large patient population.
Dual connection support
Some organizations use two types of connections for the same EHR instance: an EHR Launch connection (which lets clinicians launch EVAL from inside the EHR) and a Background Service connection (which provides API credentials for automated operations). When both exist, the patient may be linked through the EHR Launch connection, but data refresh uses the Background Service connection's credentials for authentication.
Error handling and audit logging
Every refresh operation — successful or failed — is recorded in the Activity Log on the EHR page. The system classifies errors into specific categories so you can quickly diagnose the issue: rate limit exceeded (will retry automatically), expired session or credentials, invalid connection settings, patient not found in the EHR, authentication failures, and EHR server errors. Each audit entry includes the duration, resource counts (how many FHIR resources were fetched and updated), and patient identity information.
Common scenarios
Setting up a new clinic — If you're onboarding your first patients, start by creating real patient records one at a time, or use the EHR import to bring over demographics in bulk. Check Create another patient to speed up the process.
Testing an evaluation before deploying it — Create a simulated patient, assign them to a Care Panel, schedule an evaluation, and complete it yourself to verify scoring, visibility rules, and result formatting all work as expected.
Cleaning up duplicate records — If you discover two records for the same patient, review each chart to determine which has the more complete history. Delete the duplicate and consolidate any relevant information into the remaining record.