Getting started: building evaluations
This guide walks you through building your first clinical evaluation in EVAL. By the end, you'll have created an evaluation with sections, questions, and scoring logic, tested it with scenarios, published it to your library, and optionally shared it with the EVAL community.
No coding experience is required. The Builder uses a visual interface where you design your evaluation by adding components and configuring their behavior.
Create a new evaluation
Navigate to your Private Library in the sidebar and click New Evaluation. Give it a descriptive name — something your colleagues will recognize, like "PHQ-9 Depression Screen" or "Pre-Visit Intake Form." You can also add a description and tags to help organize it later.
EVAL opens the Builder, where you'll design your evaluation's structure and logic. See Builder overview for a tour of the interface.
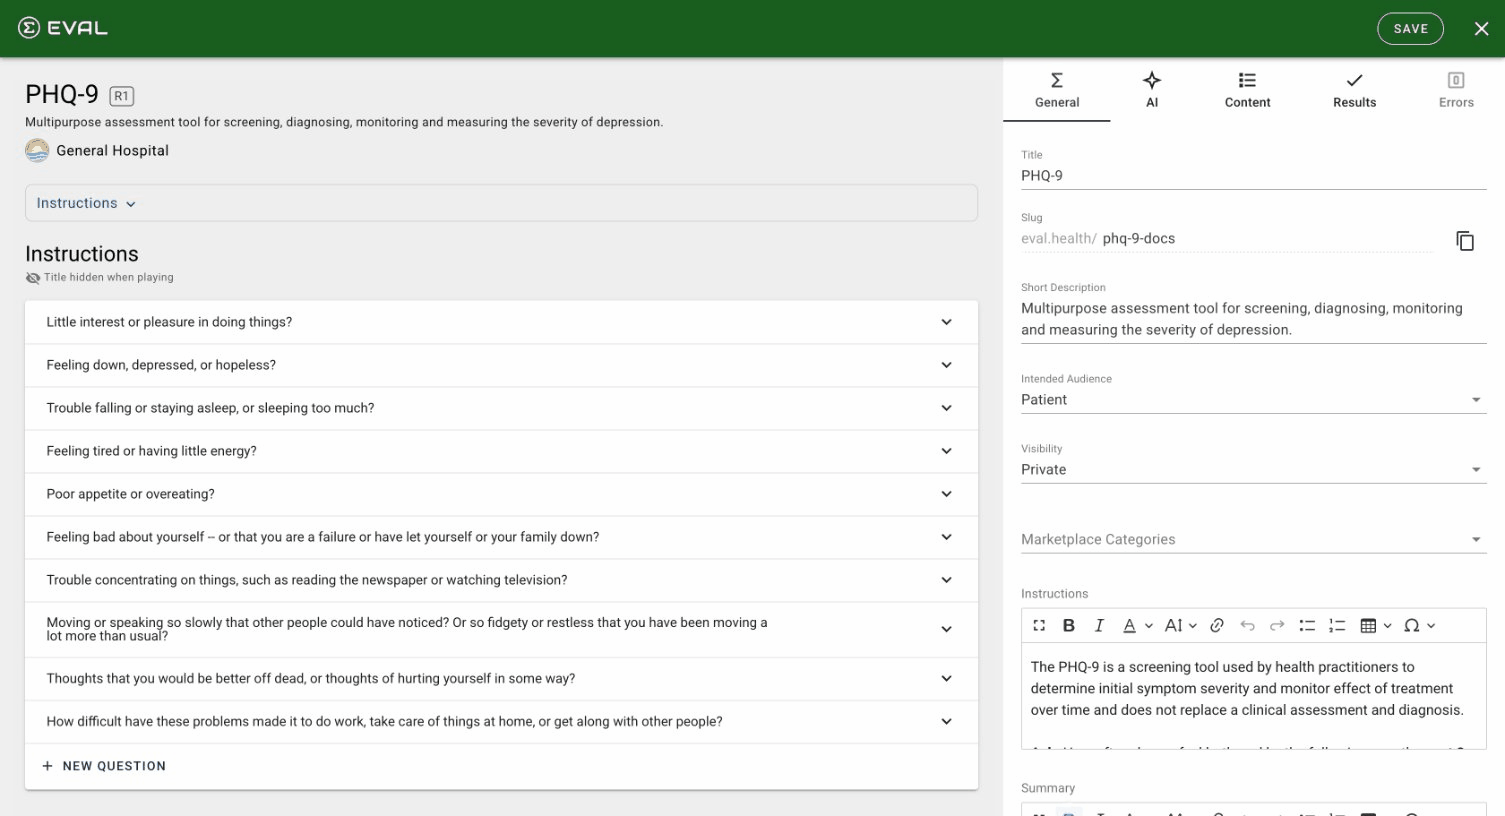
Set up the General tab
The General tab is where you configure your evaluation's metadata: title, slug (the URL-friendly version of the name), description, tags, and language settings. The slug is generated automatically from the title, but you can customize it. If your evaluation will be used by patients who speak different languages, you can add translations here.
See General settings for details.
Add sections and questions
Switch to the Content tab to start building your evaluation's structure. Click Add Section to create your first section — give it a name like "Patient Information" or "Screening Questions."
Inside the section, click Add Question and choose a question type: number (for scales and measurements), one choice (for single-select options), multiple choice (for multi-select), text (for open-ended responses), date/time, or signature. Configure each question with its text, answer options, and whether it's required.
See Sections and Questions for the full details on each question type and configuration option.
Define results and formulas
Switch to the Results tab to create the outputs your evaluation produces. Click Add Result and choose between a formula result (calculates a score from question inputs) or an information result (displays text, optionally conditional on score ranges).
For formula results, open the Formula Editor and write a spreadsheet-style expression. You can reference question values by name, use arithmetic operators, and apply conditional logic with IF statements. The editor provides autocomplete and real-time validation.
See Results and Formula Editor.
Add visibility rules (optional)
Visibility rules make your evaluation adaptive — showing or hiding sections, questions, or results based on earlier responses. For example, you might show a follow-up question only when the patient selects "Yes" to a screening question, or display a specific clinical recommendation only when a score exceeds a threshold.
Add visibility rules from the settings panel of any section, question, or result. See Visibility rules.
Test with scenario testing
Before publishing, test your evaluation's logic using the scenario testing tool. Create test scenarios with predefined question values and verify that your formulas calculate the expected scores and your visibility rules show the correct elements. You can create multiple scenarios to cover different clinical paths — for example, a low-risk scenario where all screening questions are negative and a high-risk scenario that triggers every follow-up question.
This catches logic errors before your evaluation reaches patients. See Scenario testing.
Preview and publish
Click Preview in the builder toolbar to walk through your evaluation as a patient would see it. Check that questions display correctly, navigation flows smoothly, and results appear as expected. Pay particular attention to conditional elements — visibility rules should show and hide the right content based on your test answers.
When you're satisfied, click Publish. Publishing creates a new revision of your evaluation, making it available in your library where it can be assigned to patients, shared with your team, or deployed through schedules and intake links. You can continue editing after publishing — changes won't affect the live version until you publish again. See Publishing.
Share with your team
By default, new evaluations are in your Private Library. To make an evaluation available to your entire organization, adjust its sharing permissions. You can grant view access, edit access, or full management rights to specific team members or your entire account.
See Permissions for sharing options.
Publish to the Marketplace (optional)
If you've built an evaluation that could benefit the broader healthcare community, consider publishing it to the EVAL Marketplace. Marketplace submissions go through a review process to ensure quality. Once approved, your evaluation is discoverable by any EVAL user worldwide, with full attribution to you and your organization.
See Marketplace for submission guidelines.
Getting started: clinical providers
A step-by-step onboarding path for clinicians, nurses, and care coordinators — from first sign-in to managing a patient population in EVAL.
Getting started: administrators
A step-by-step onboarding path for account administrators — from organization setup to team management, billing, and EHR connections.