
101: Basic App with Visibility Rules
Example: Adult Urinary Retention Evaluation & Catheterization Algorithm (URECA)
Check out our YouTube video discussing how we converted the URECA algorithm into an app.

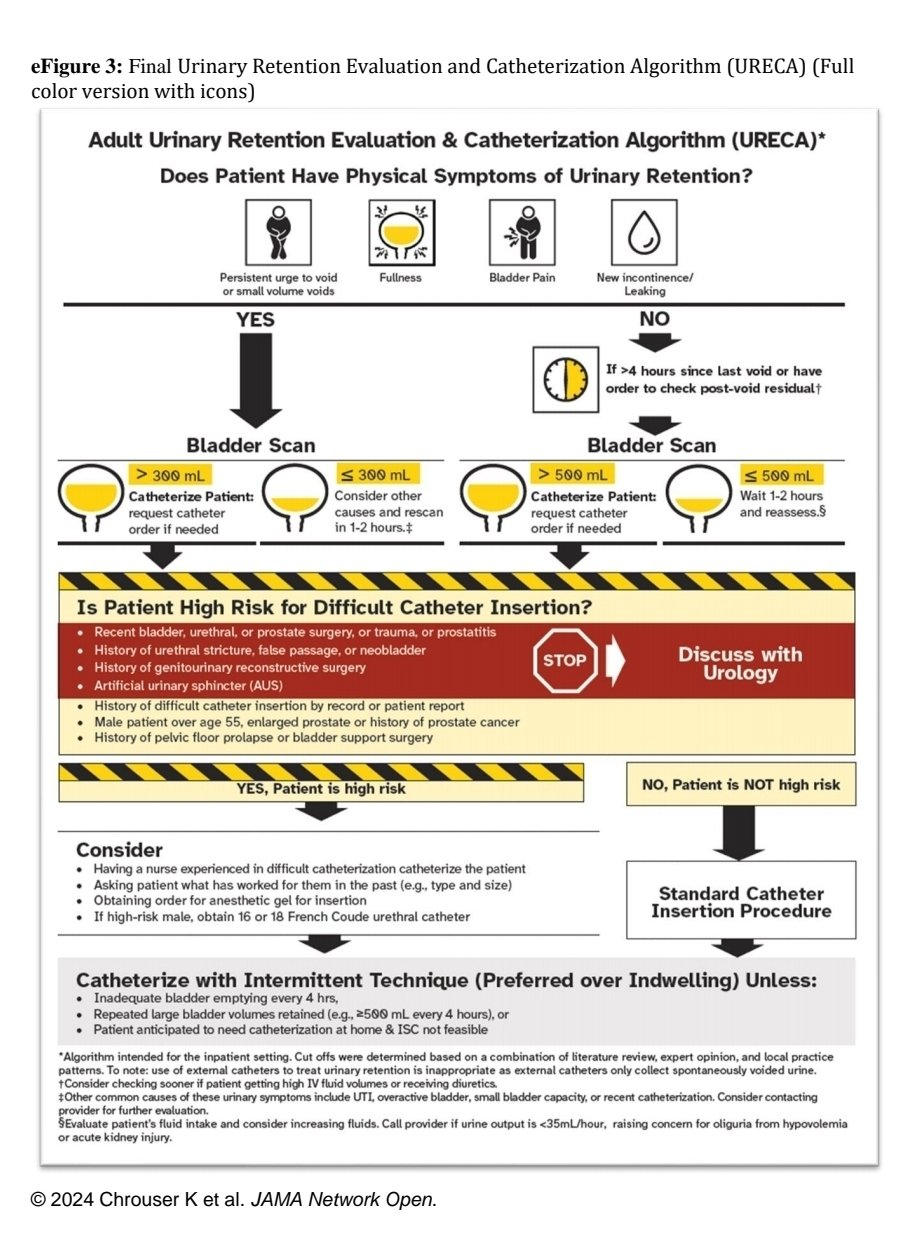
The following is an example of a nursing clinical decision workflow for the evaluation of urinary retention. The decision tool helps the nurse to identify when it is safe to perform a catheterization and when to call a specialist for assistance. Symptoms and criteria determine the need for a bladder scan. Recommendations are made based on the results of the bladder scan and certain risk factors.
To build an application in EVAL that supports this workflow, we recommend the following steps:
STEP 1: Breakdown Components of Workflow
We will first identify the components of the workflow, identifying potential questions and results that will comprise a set of logic steps. An example of this breakdown is as shown:
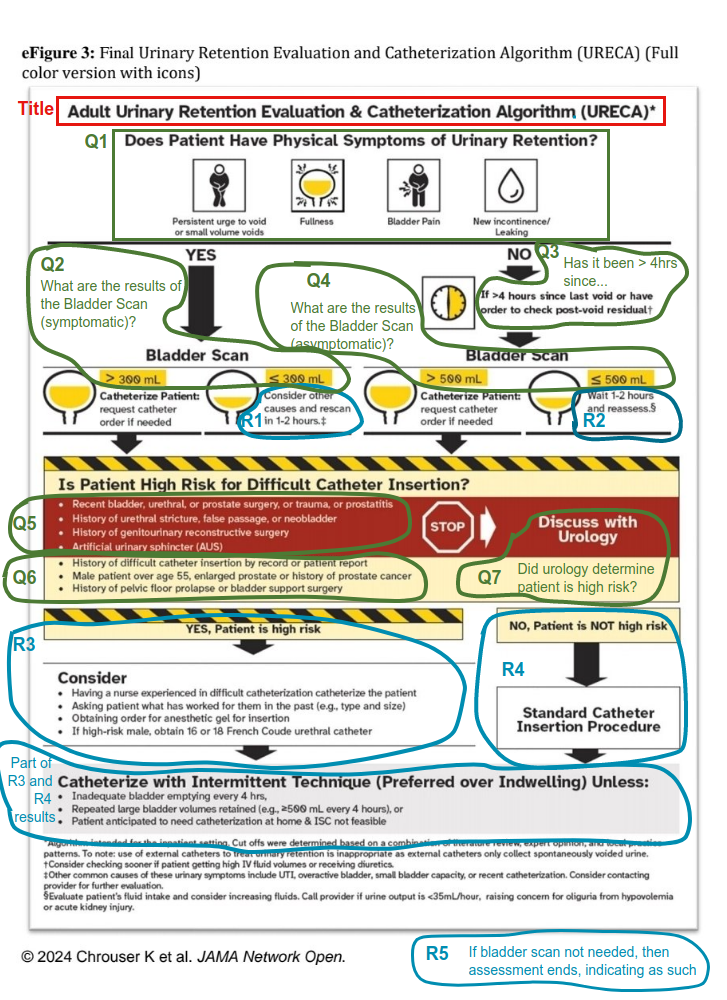
From this preliminary breakdown, the application appears to have 7 questions with 5 results that will display based on well-defined logic criteria or if-then statements.
STEP 2: Diagram the Process Flow for the New EVAL App
The marked-up diagram in Step 1 was translated into a logic workflow as follows:
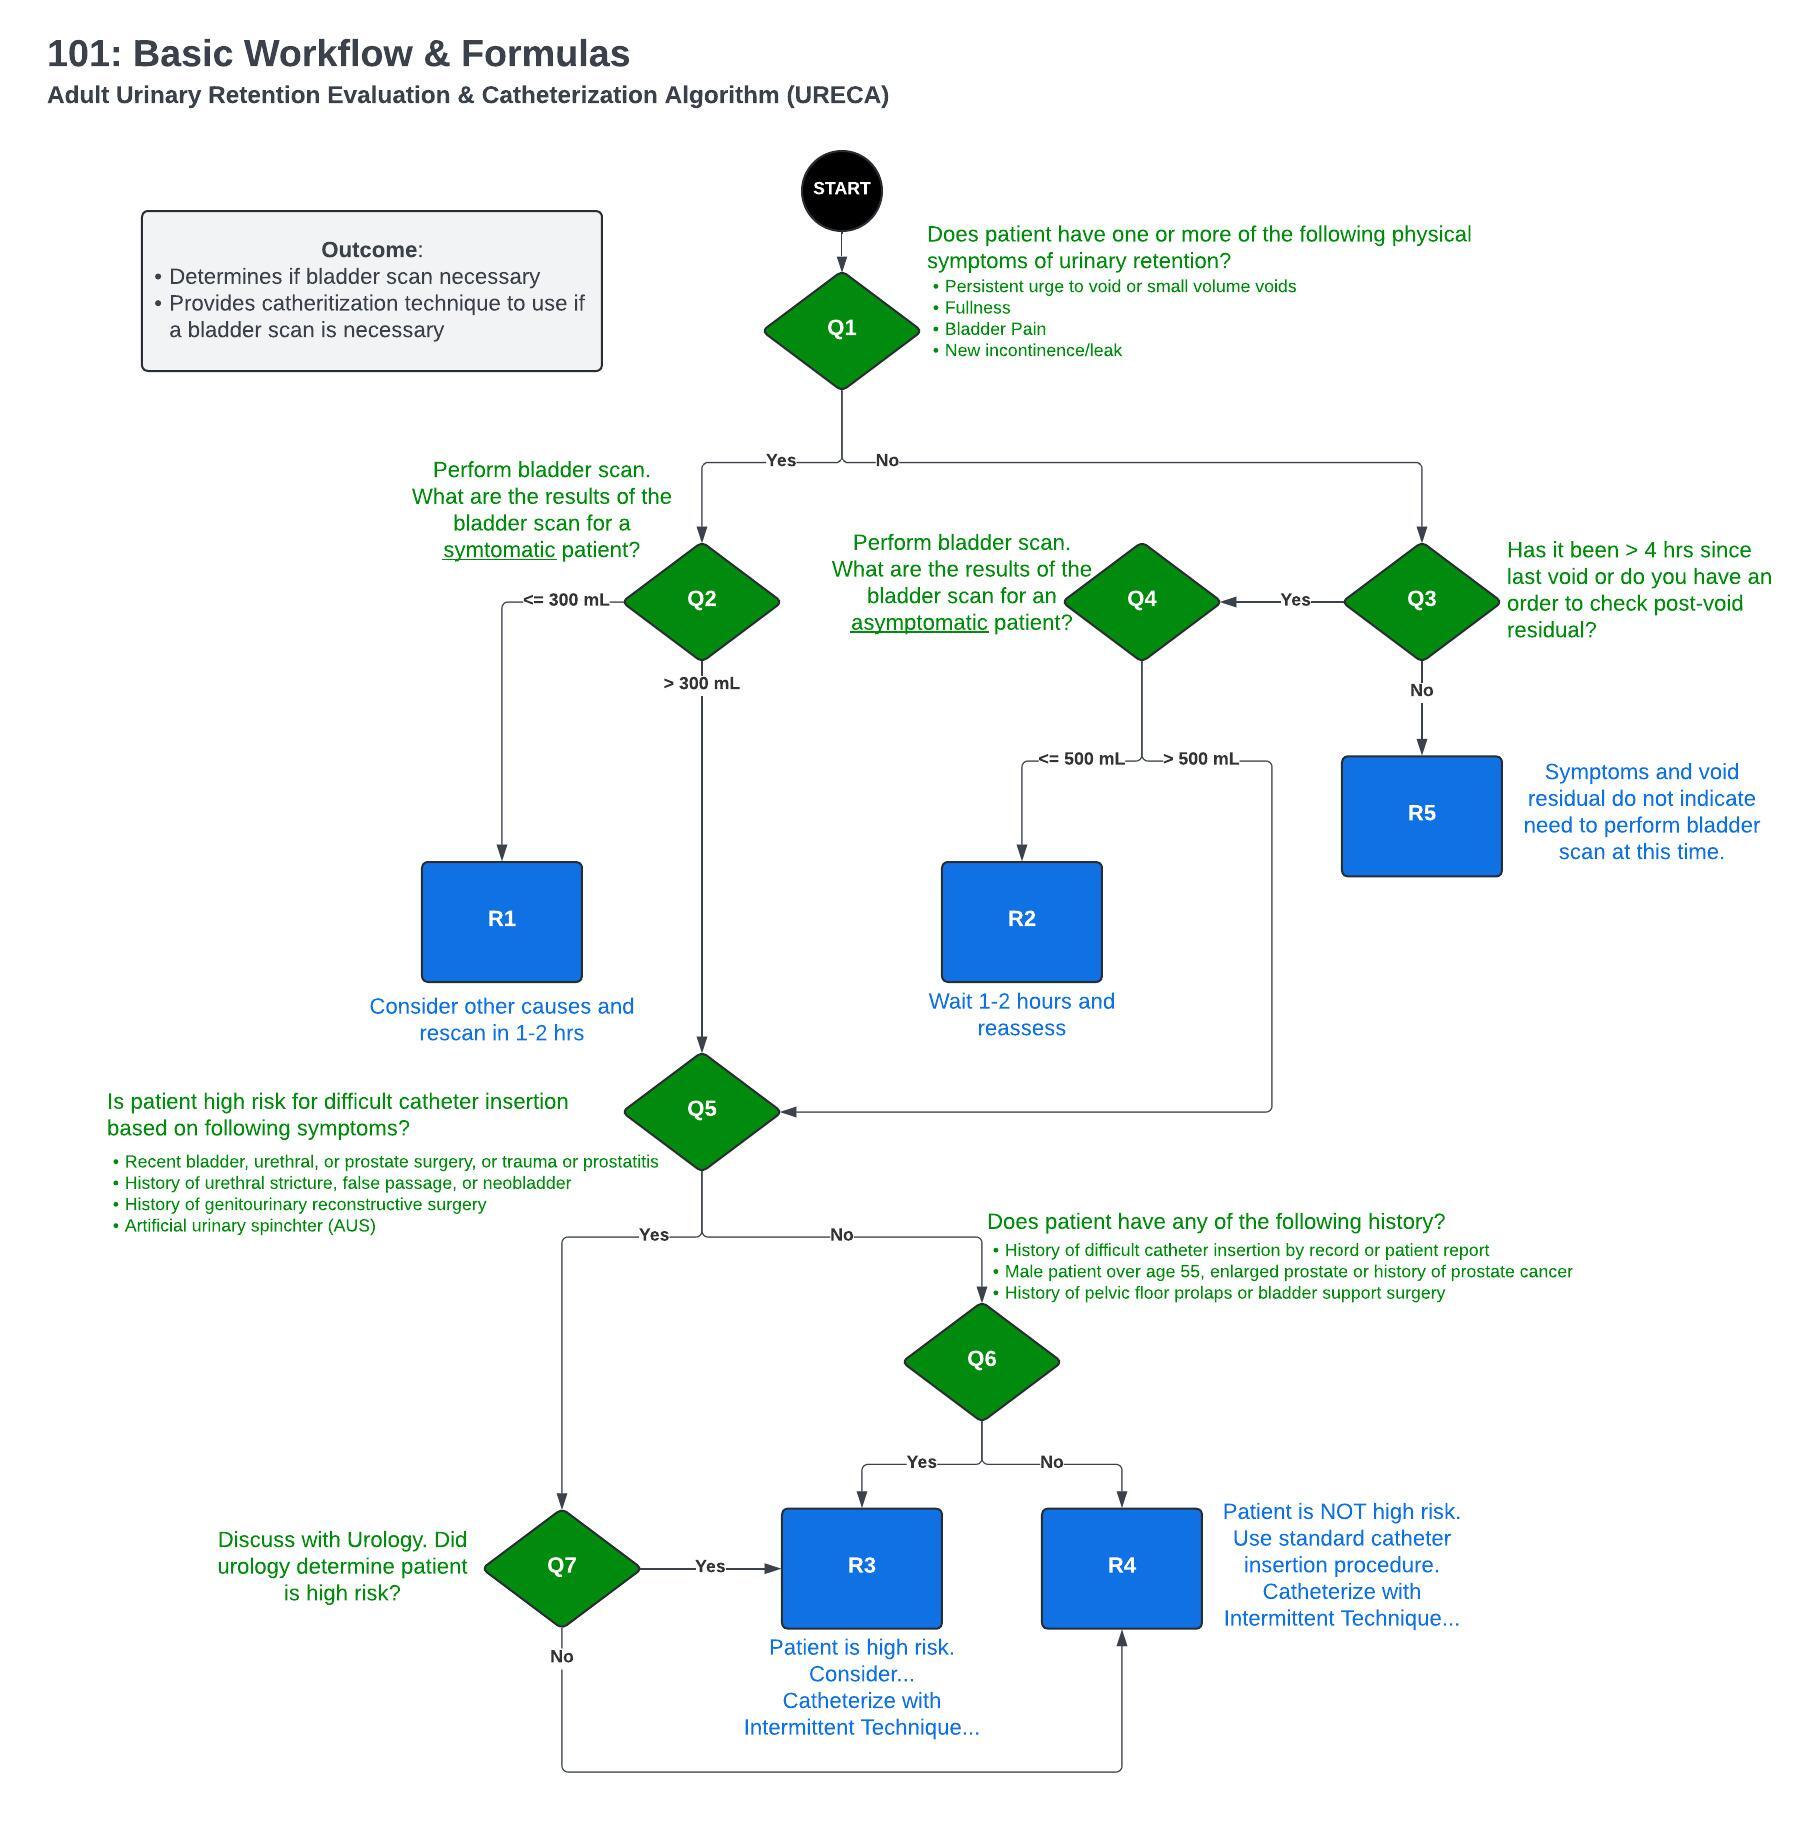
Important Callouts
- Strive for simplicity: Keep choice options to a minimum. If choices don't drive logic or results, consider revising to simple yes/no responses. For example in Q1, we kept the choices to Yes and No rather than listing out the 4 physical symptoms individually. The patient only needs to have one of those symptoms to move forward in the "Yes" pathways, it doesn't matter which symptom they have.
- Logic components are uniquely identified. Each section, question and result must stand on its own. In this example, Q2 and Q4 are basically the same question, but the choices are different depending on where you are at in the workflow, so the wording was revised slightly. Q2 indicates it pertains to symptomatic patients and Q4 pertains to asymptomatic patients. When searching the source library for components (sections, questions, choices and results) to create logic connections, you want to ensure you can clearly differentiate your selections.
- Account for every possible outcome. Like a probability problem or a Punnett square, every choice or combination of choices must track to an outcome. For example, in Step 1, the workflow diagram is not explicit when the following condition has not been met, > 4 hrs since last void or there is no order to check post-void residual. R5 has been added to account for when a bladder scan does not need to be performed.
STEP 3: Peer Review Schematics and Logic
Early peer review of steps 1 & 2 will save you time by catching translational inaccuracies, logic gaps, computational errors or design flaws before building the EVAL app.
STEP 4: Build App in EVAL
{PUT SAMPLE OF THIS AS A BUILT OUT APP IN BUILDER}
STEP 5: Conduct Peer Review & Manual Test
Testing includes using the scenario test feature to build robust tests for each result. Additionally, ask trusted peers to manually test every possible logic scenario associated with each result and to inspect the builder for possible translational inaccuracies, logic gaps, computational errors or design flaws. It is critical to patient safety that logic schematics are vetted through peer review and the blueprints match the working app.
Updated over 1 year ago