
*Applications
Intro to Applications
The Evaluation tab is the first step in creating an application. On this tab you will create an application shell by entering key metadata. Once the shell is created, you can begin building your application by navigating through the other tabs (sections, questions, and results) that are covered in the other sections of this guide.
The color of the header differs between Player & Builder to distinguish the two components
- Player has a blue header bar
- Builder has a green header bar
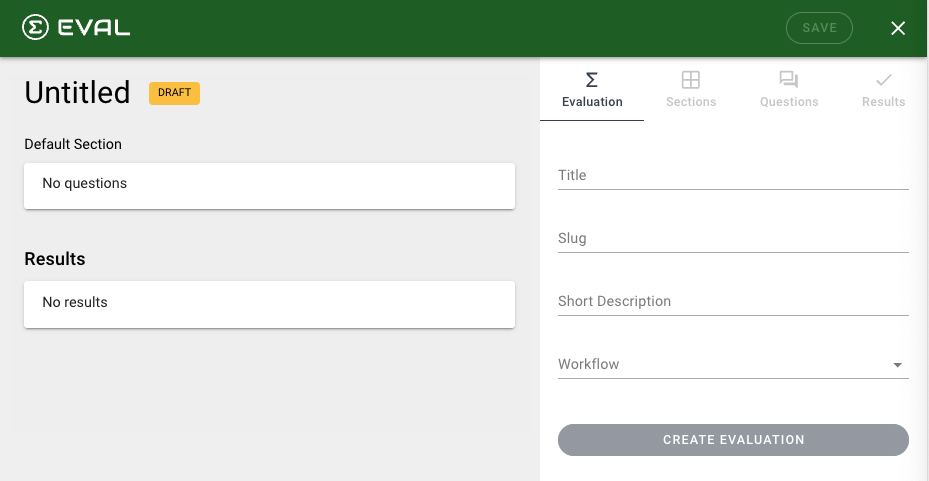
Application Tab User Interface
Provide the following metadata for the application:
Title
Name of your application.
Slug
The last part of a URL that identifies the particular page for your application. This will default based on the title provided but can be updated. This must be unique across all applications in EVAL.
Short Description
A brief description for the application. This will appear to others when you publish it to describe the application.
Presentation
How questions are displayed in the Player, which will be one of the following:
- Section by Section - A full section of questions will appear as a grouping. When all questions in the section are answered, then the next section will be displayed.
- Question by Question - Only one question will appear at a time. When the question is answered, the next question will be displayed.
Visibility
- Public - Anyone on internet. Verified accounts only.
- Account - Account members and selected members on any account.
- Private - Collaborators and selected members from any account.
After providing the above content, click Create Evaluation.
A shell has been created for your application. You are ready to further build it out in the next few sections of this guide.
Instructions
Provide additional background for users running the application to learn more about how the application works and what users can expect. You can use various formatting features including: bold, italic, font color, links, bullet list, numbered list, tables, and special characters with the ability to expand the description box to a larger view for editing and un-doing/re-doing changes as needed.
About
Build trust with your users by summarizing important inputs and outputs, calculations and logic workflow. Consider providing a description of how the application is applied in clinical practice in the Usage section. Consider discussing significant factors, such as the clinical context and population considerations, and the strengths and limitations of the application. Similar to the Summary above, you can use various formatting features.
You can use the same formatting features as with the Instructions.
Literature
Provide literature that supports the subject matter of the application. Clicking New Literature will prompt for the following:
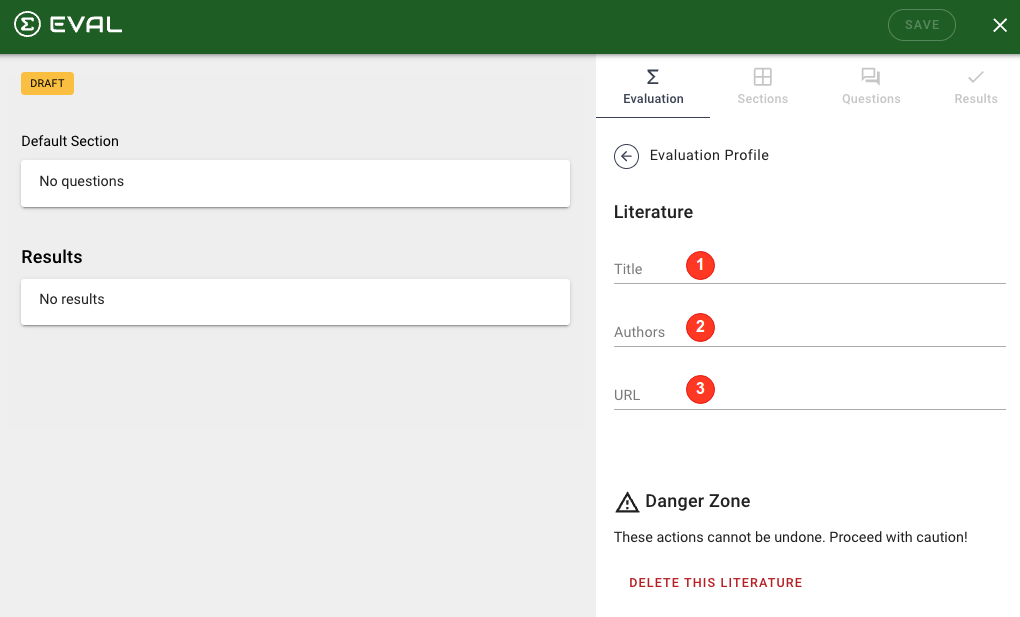
For each literature added, you must provide:
- Title
- Authors
- URL
After providing a literature, click Evaluation Profile to go back to the previous page.
Attribution
Provide attribution to other individuals that contributed to the application content. Clicking New Attribution will prompt for the following:
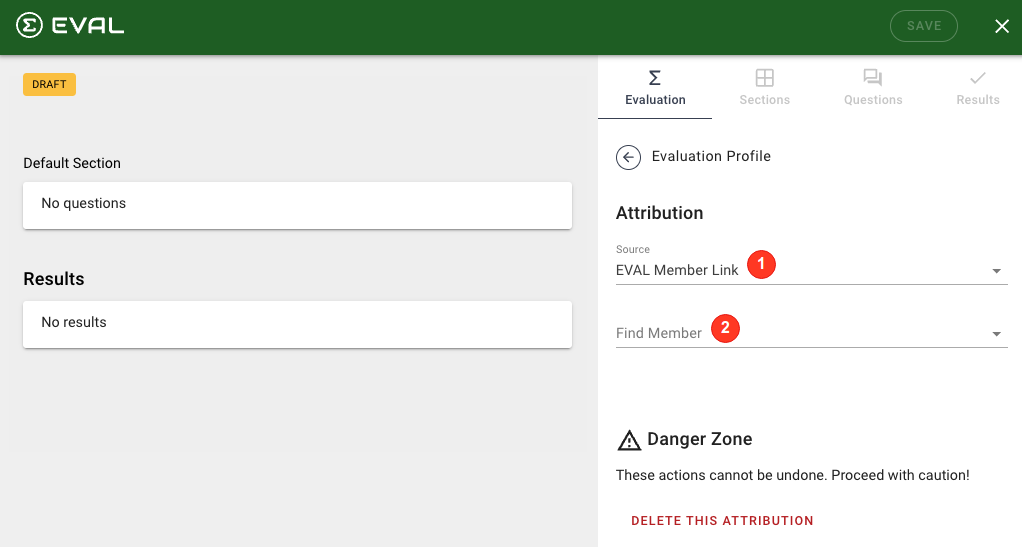
For each attribution, you must provide:
- Source - either EVAL Member Link or Manual Entry
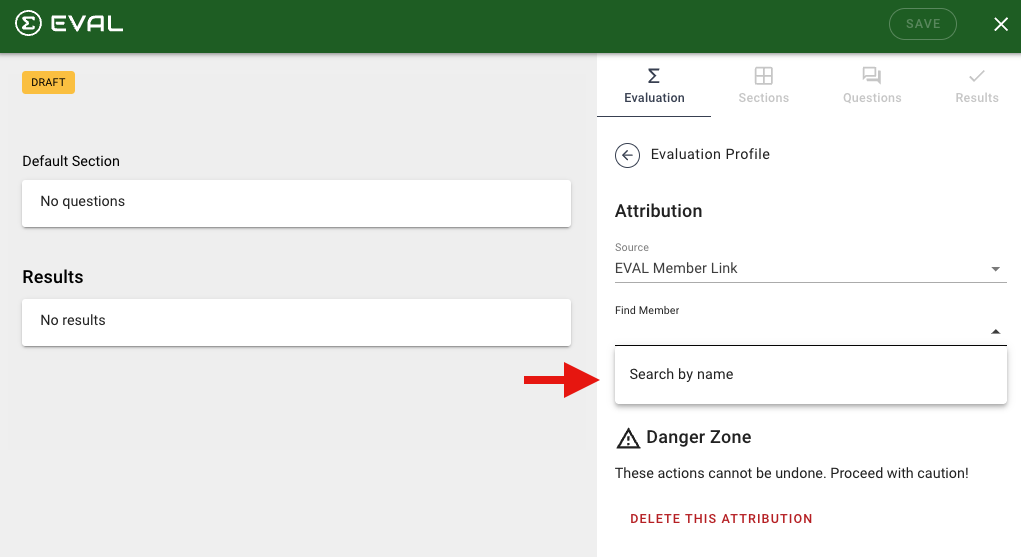
- Find Member - This field displays if you choose source of EVAL Member Link. With this option, you will be able to search and choose a member:
If you choose a source of Manual Entry, you can provide the following additional fields:
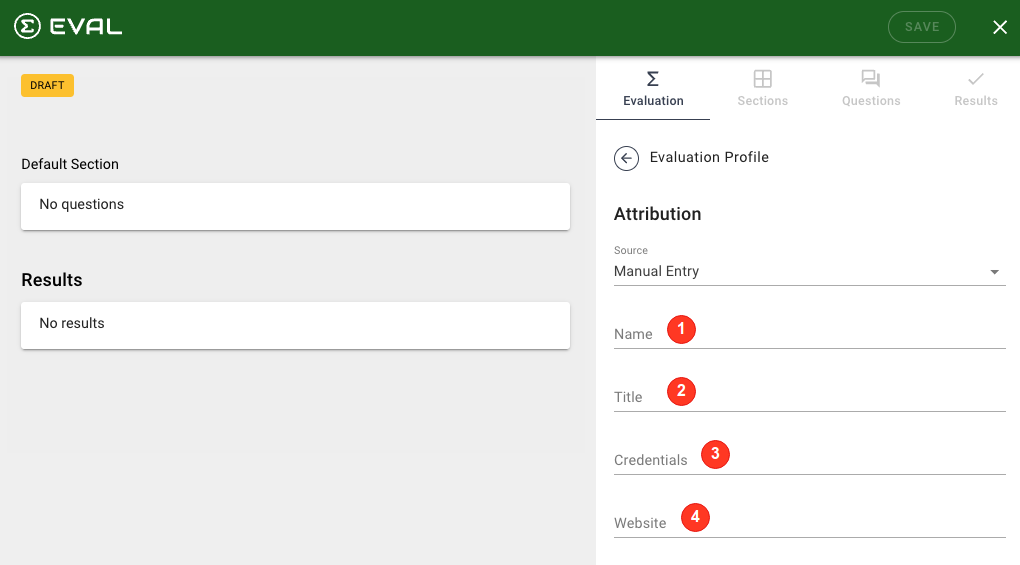
- Name
- Title
- Credentials
- Website
Click Save Evaluation (see the first image above on this page), to save the application metadata.
Building out the Application
After providing and saving the application metadata, the Outline Pane is enabled to start building out your application.
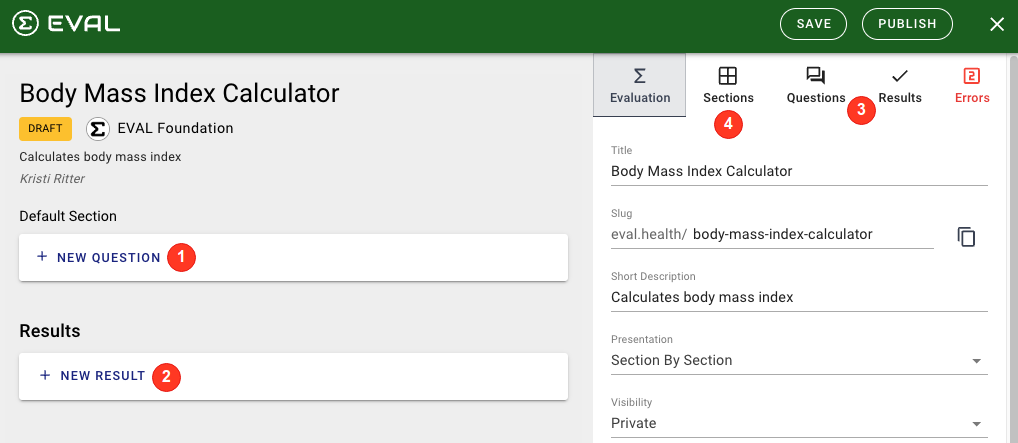
- Add questions to your application directly from the Outline pane.
- Also from the Outline pane, you can directly add your results.
- An alternative to using the Outline pane is to navigate to the Questions or Results tabs to access more detailed options and tools.
- Clicking the Sections tab allows you to create custom sections and question groupings within a section.
Editing Applications
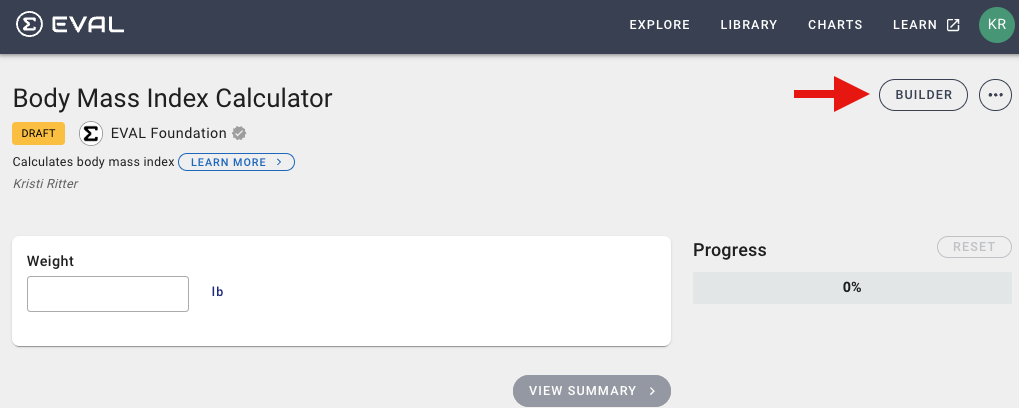
To edit an application in your library, click on your application, and then click Builder
Your application will be displayed. Click Edit in the green header bar to make changes to your application.
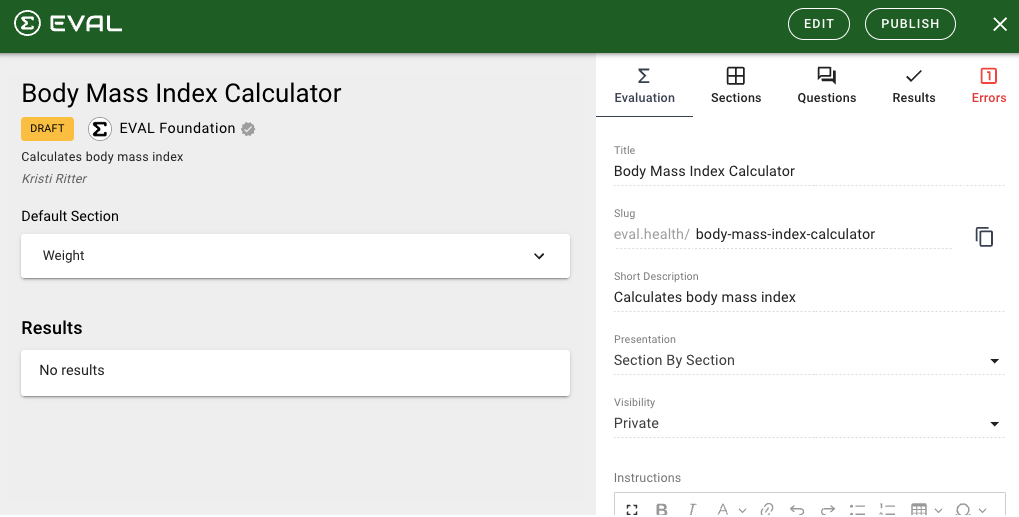
When you are in Edit mode, the green header bar changes as shown below. Note: The button, Revision 1(above), changed to draft (Below). When a published revision is edited, a new draft is created. When the draft is published, a new revision will be created.

After making your changes, click Save, then click the "X" to close.
Deleting Applications
After you have saved an application, you will see a Danger Zone section displayed. This is only displayed when you are in Edit mode.
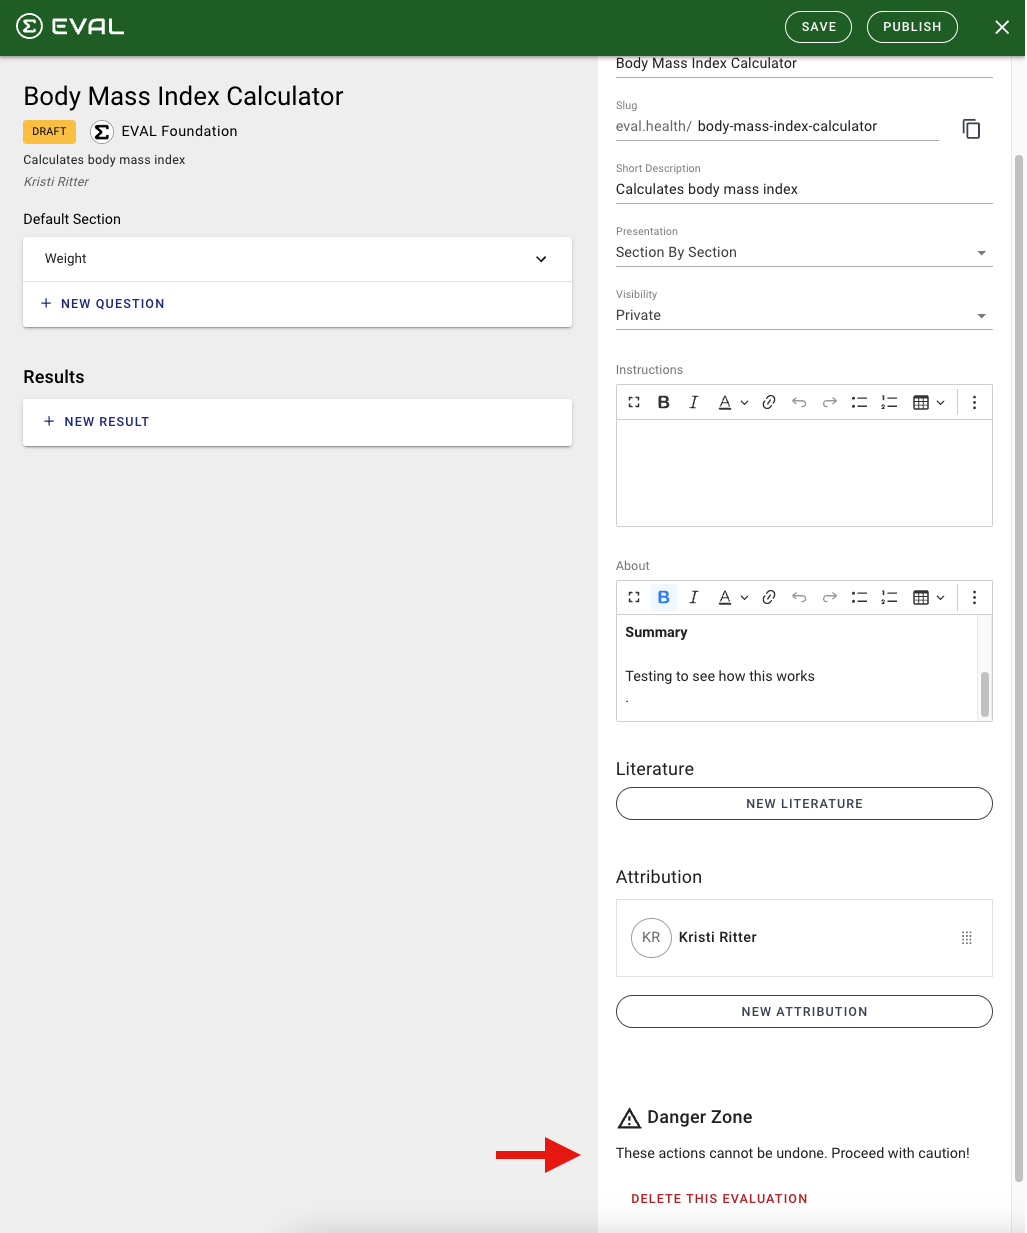
This Danger Zone section is a caution you will see on various area throughout the app that warn what the action cannot be undone. Click Delete this Application and confirm the prompt to delete.
Updated over 1 year ago