Getting Started
Let's get started by creating your first application. You will create an application that asks about an area of pain and then suggests yoga activities based on the pain area selected.
In this Getting Started tutorial, you will learn how to:
- Create an application that has one question with multiple choices
- Create results that will guide users to a logical conclusion
- Apply logic using visibility rules that link a choice to a result
Watch the entire Getting Started YouTube video series.
Create Account
Watch a video tutorial on how to create your EVAL account. Continue reading this section for written instructions as well.
If you have not already done so, navigate to https://eval.health/login and create an account
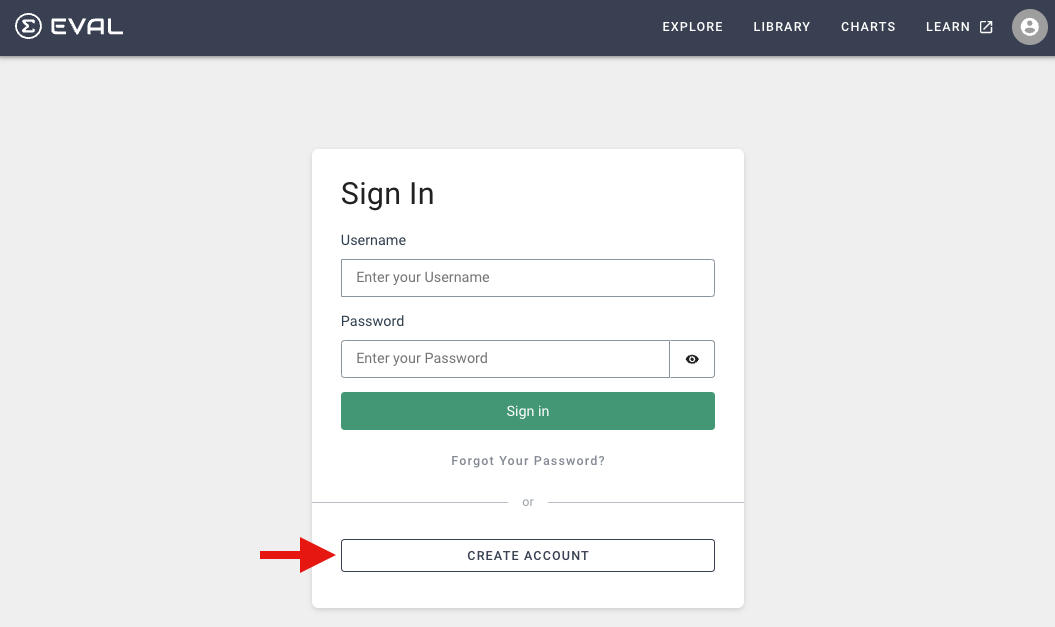
Click Create Account
A page displays to enter your account details:
Populate the content and click Create Account to save changes, and then login using your new account credentials.
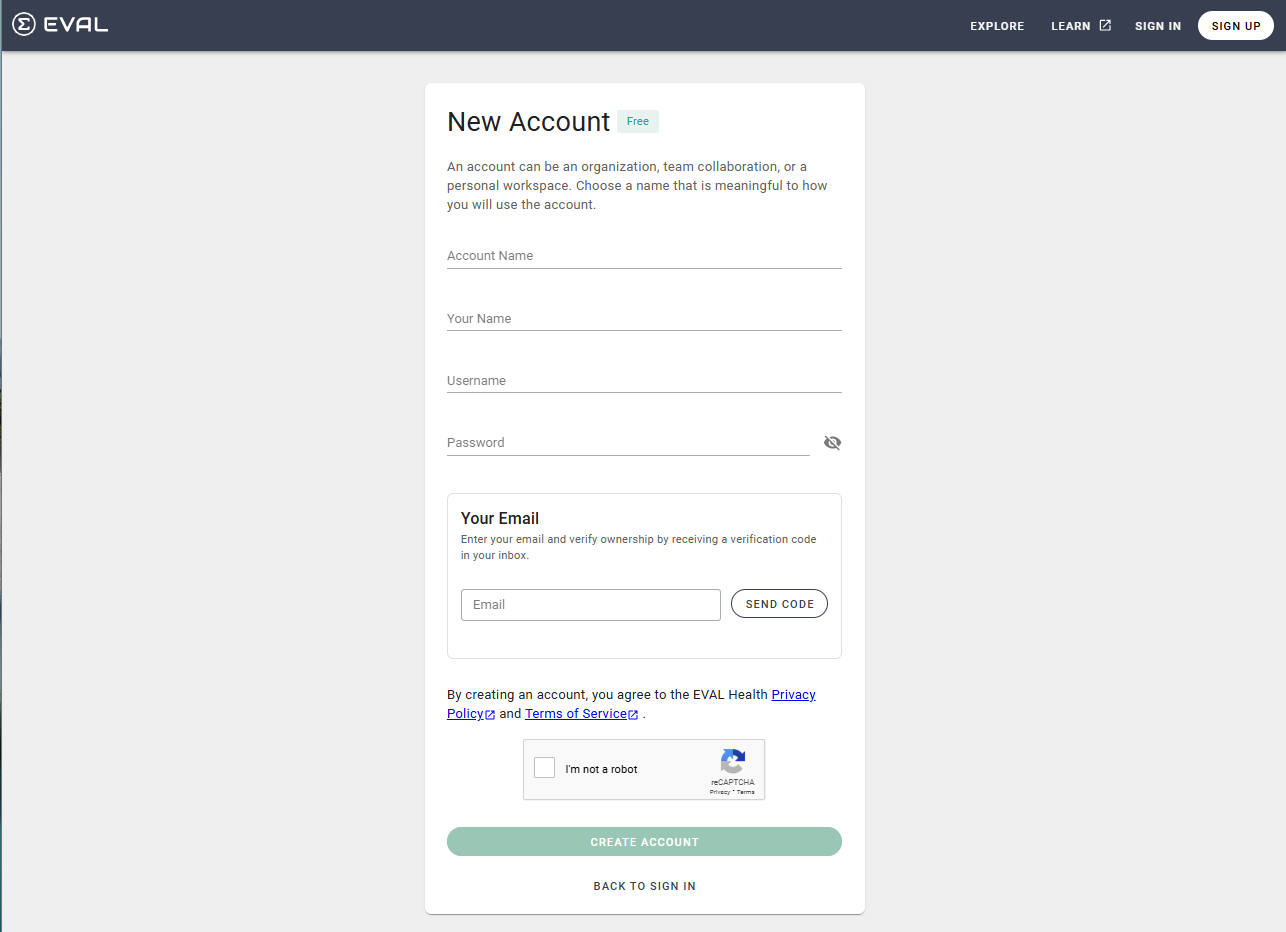
For any additional details on the above content, please navigate to the Account Creation page.
Create First Application
Watch a video tutorial on how to create your first EVAL app. Continue reading this section for written instructions as well.
Create Application Shell
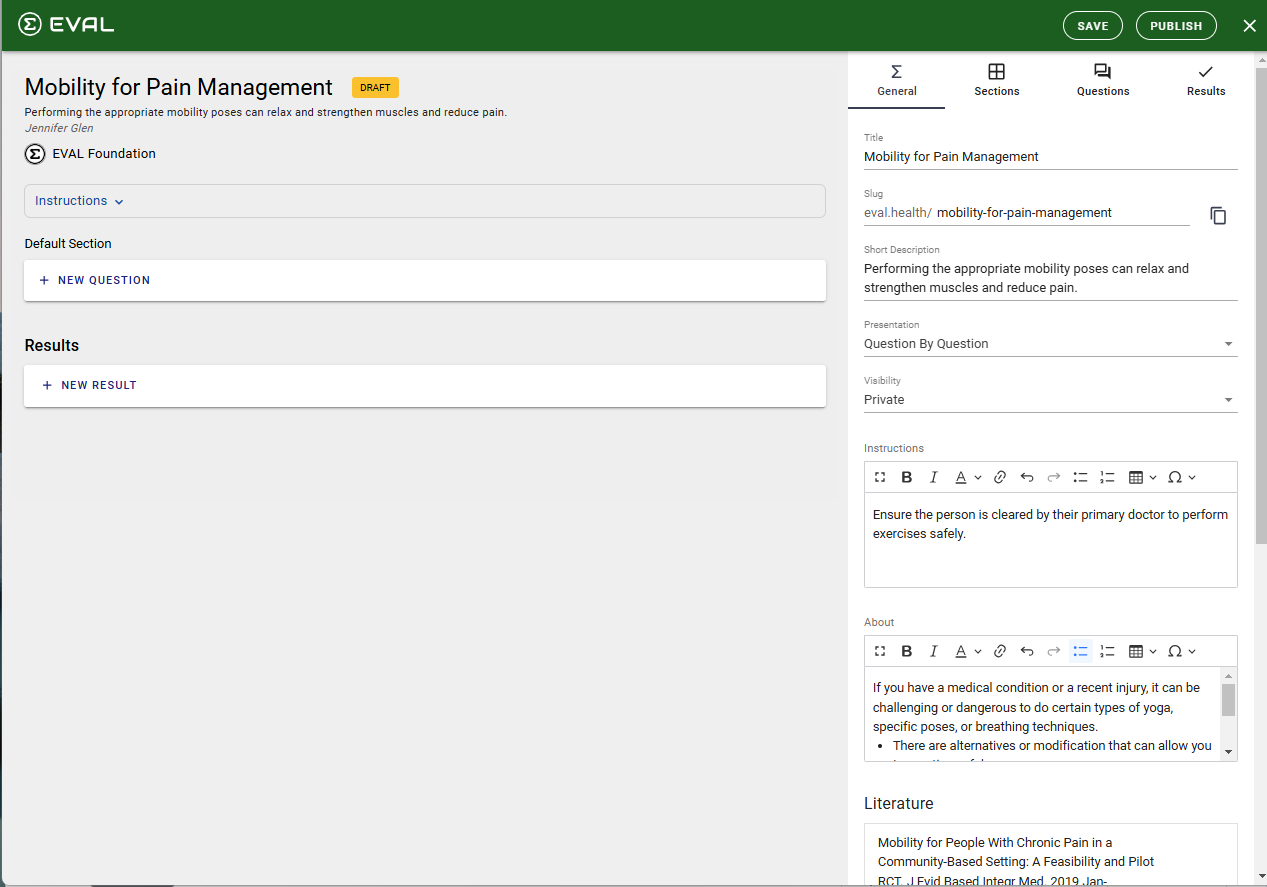
Login to the app at eval.health and click Library and then New Eval to create a new application:

You are now in the Builder component of the app.
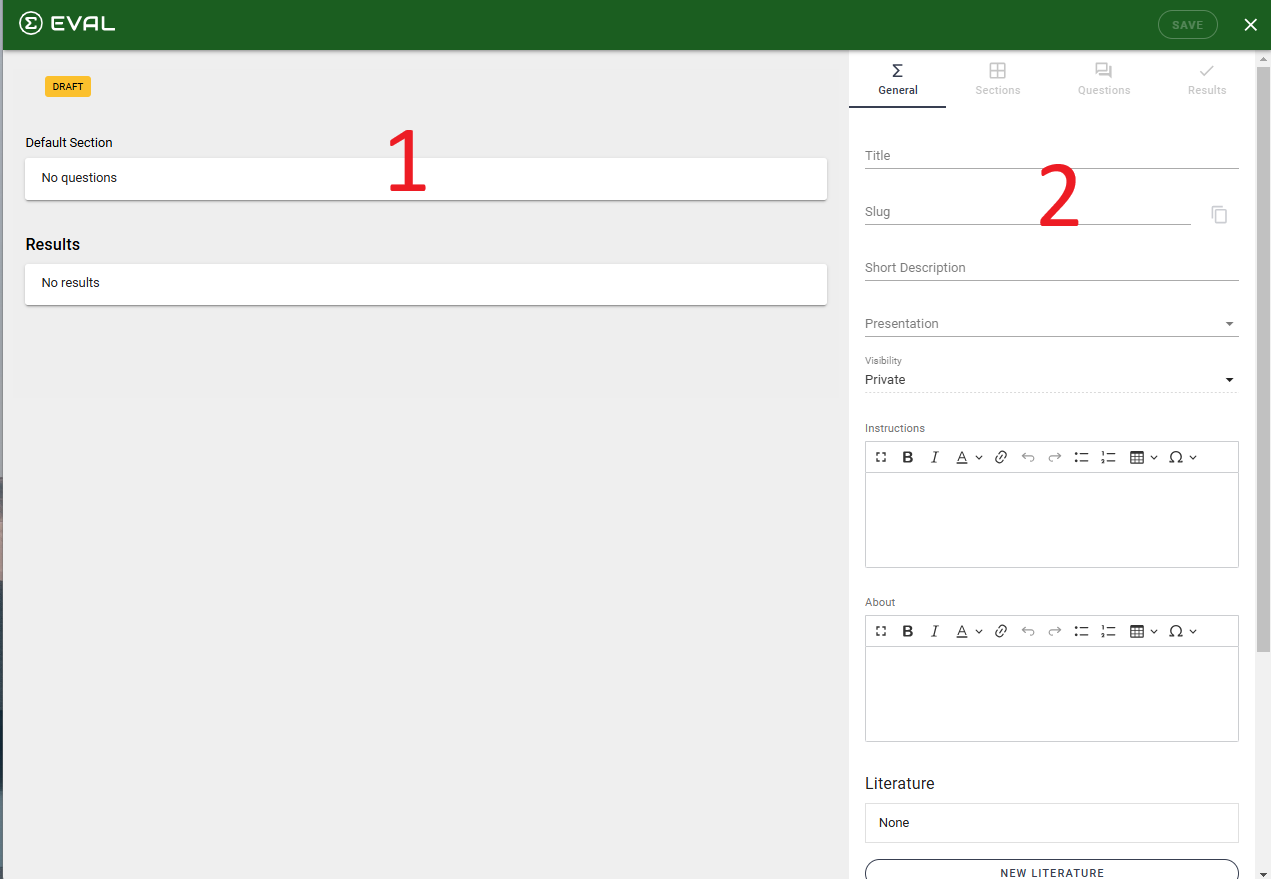
- The Outline Pane (left side) highlights key areas of your application and displays content as you it out. You can also click any area to expand more detail and add content in the detail pane.
- The Details Pane (right side) displays all of the details needed to build out your application. It contains several tabs (Applications, Sections, Questions, and Results) that are further described below.) The detail pane also responds to any area you click on in the outline pane
Provide Application Info
You will start by populating basic information on your application.
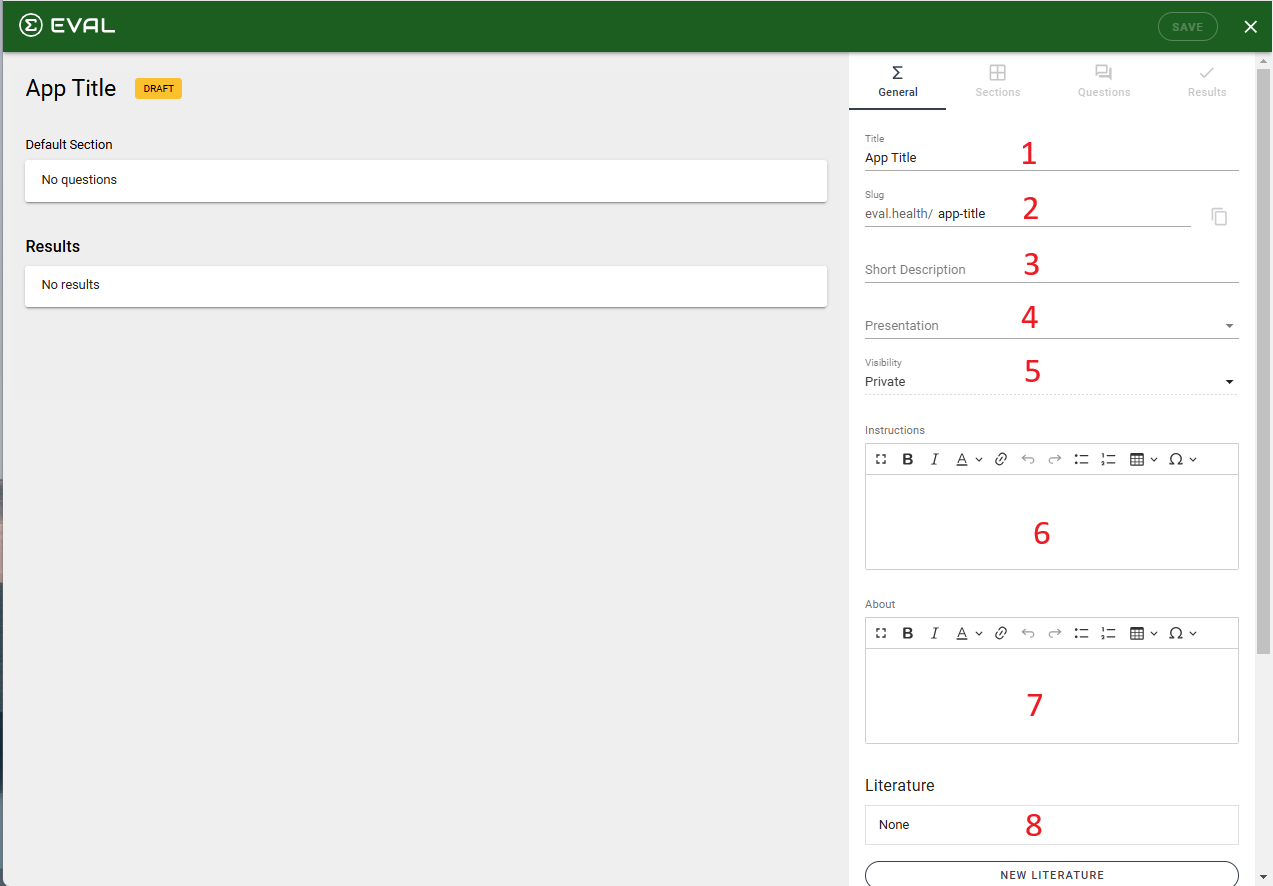

- Enter Title, such as "Yoga for Pain Relief" (must be unique to other names)
- Skip Slug as it will automatically be populated based on Title
- Enter a Short Description (sample in screenshot below)
- Select the Presentation called Question By Question, which will display questions one at a time versus showing all of the questions section by section.
- The Visibility of the app will default to Private. After the app is published, the Account Admin can change the app to Public.
- Enter any Instructions you will like to appear under the title of the app.
- Enter app details for users to review in the About section.
- Click on the New Literature button to add sources.
- Scroll down and click the New Attribution button to set up Attribution.
- Click Create Evaluation to save the app shell.
After you have populated the above, the shell of your application has been created as shown below:
Create a Question
Next, build the question for the application.
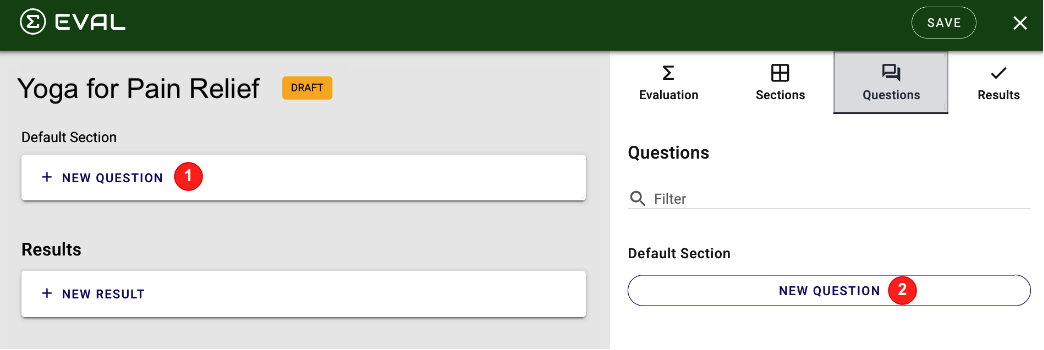
To start adding questions to your application, you can either:
- Click New Question in the Outline Pane OR
- Click New Question in the Questions tab of the Details Pane
The following displays:
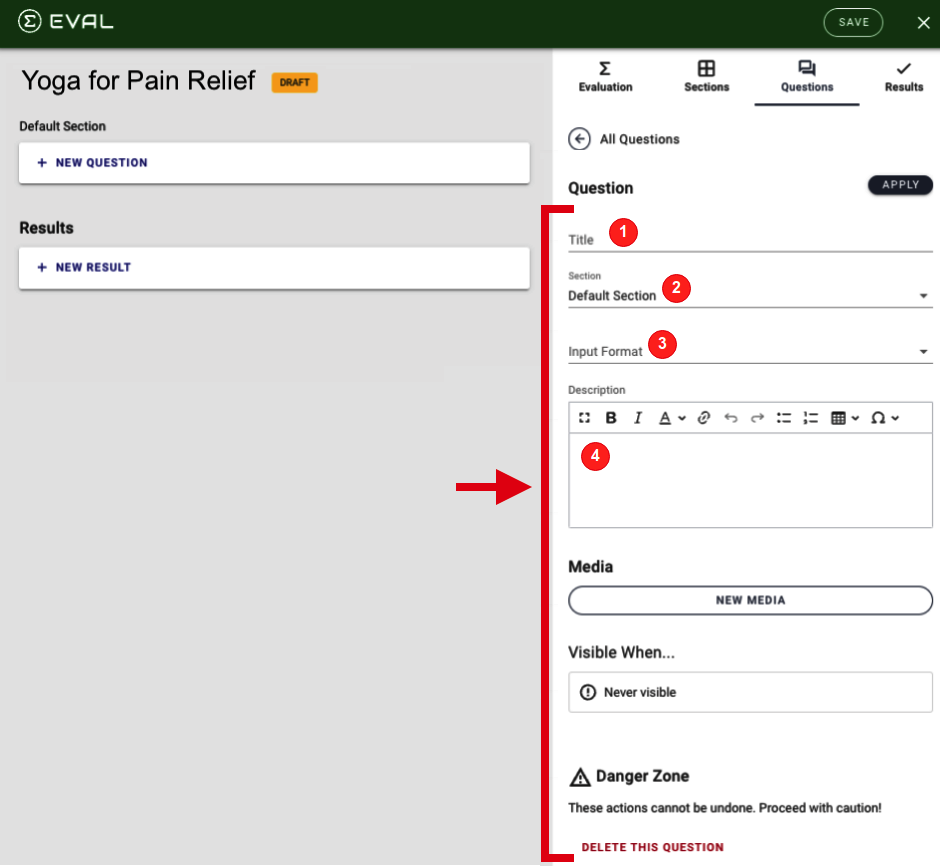
- Enter Title of Where are you having the most pain?
- Keep Section as Default Section
- Choose Input Format of Select One
- Leave the Description blank
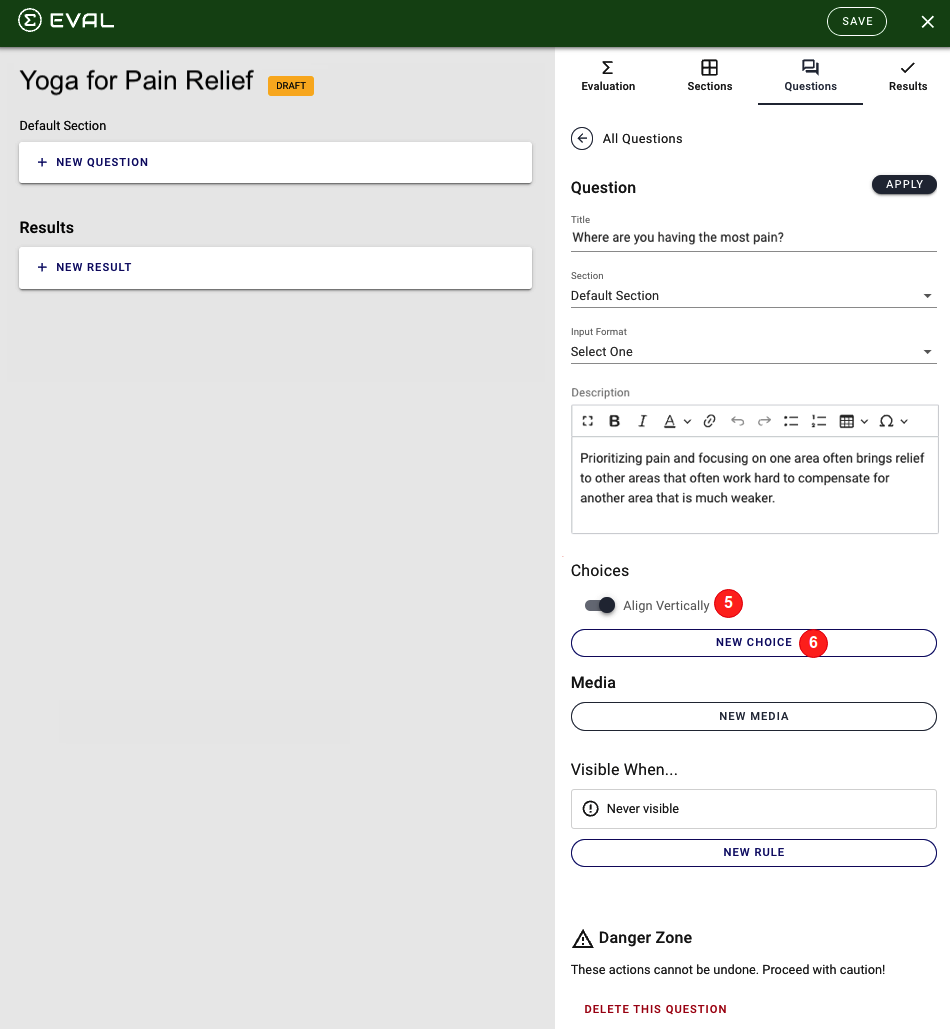
- In the Choices section, toggle Align Vertically "on" (toggle button will be shaded blue when on).
NOTE that this field became visible when you chose Select One for the Input Format - Click New Choice. The following displays:
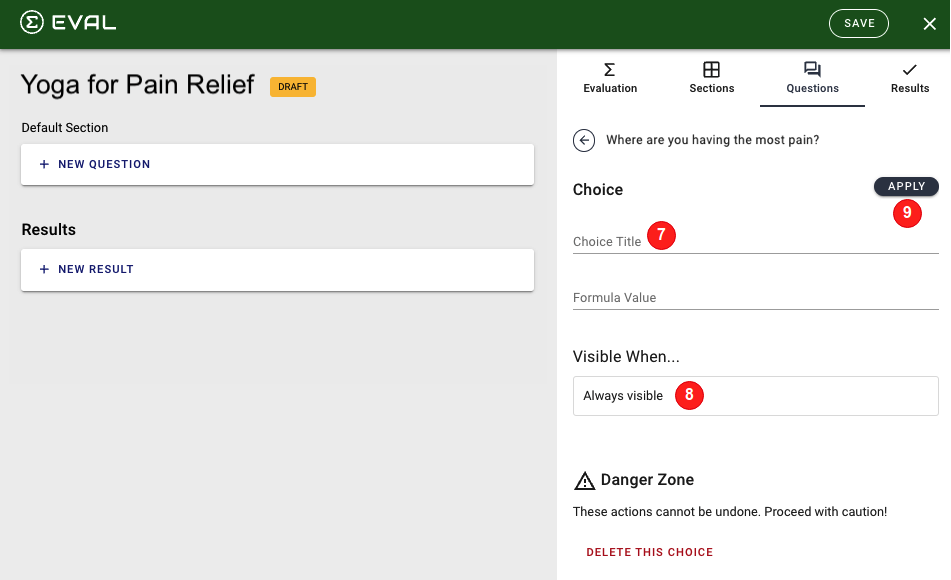
- Enter Choice Title of Neck
- Leave the Visible When setting at Always visible
- Click Apply
- Repeat steps 7-9 for the second choice by populating the following:
- Choice Title of Back
- Leave the Visible When setting at Always visible
- Repeat steps 7-9 for the third choice by populating the following:
- Choice Title of Hip
- Leave the Visible When setting at Always visible
- Your choices should reflect as shown below in the red outlined box.
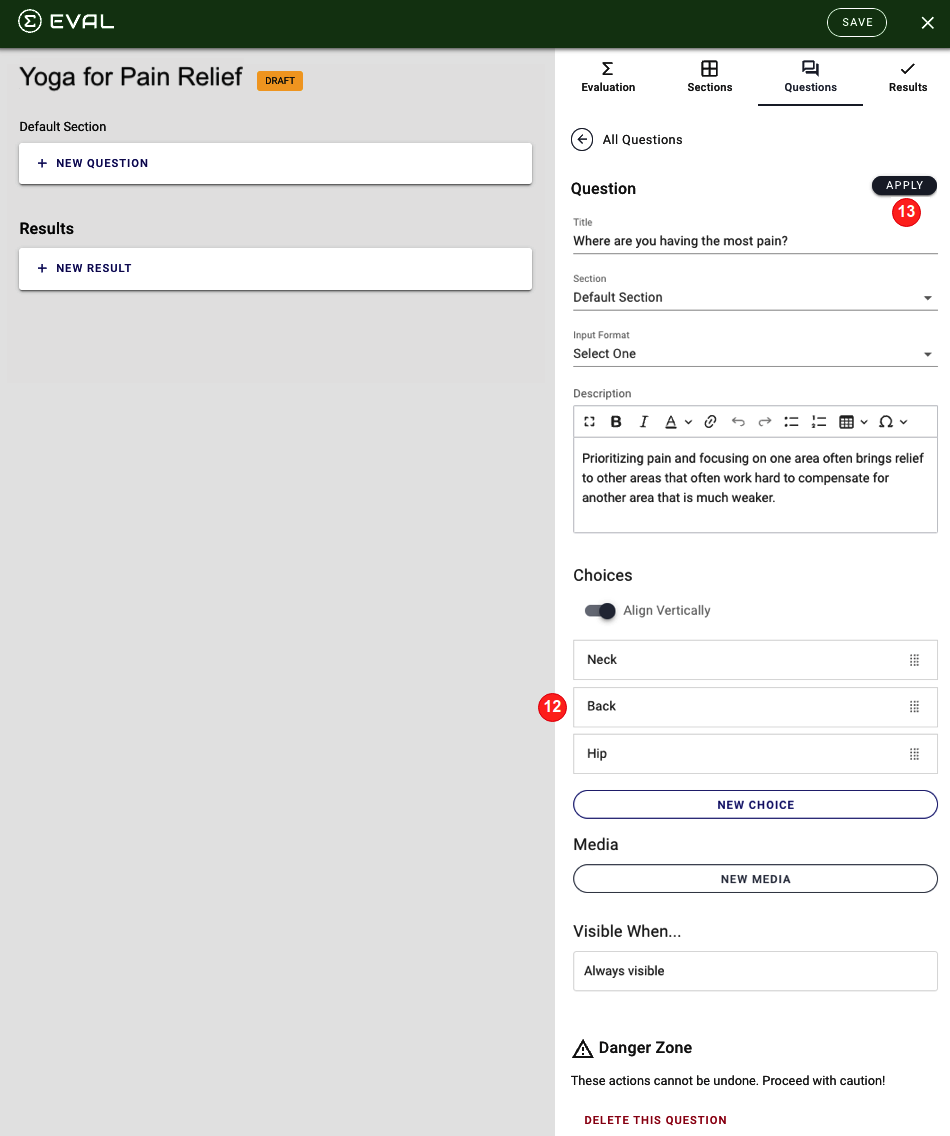
- Click Apply to save your question.
You have created your questions and now ready to build out the results!
Create Results
You will be now be configuring your application to display a result based on the responses from the above question.
- Click the Results tab and click New Result. (This option is available in both the left and right panel)
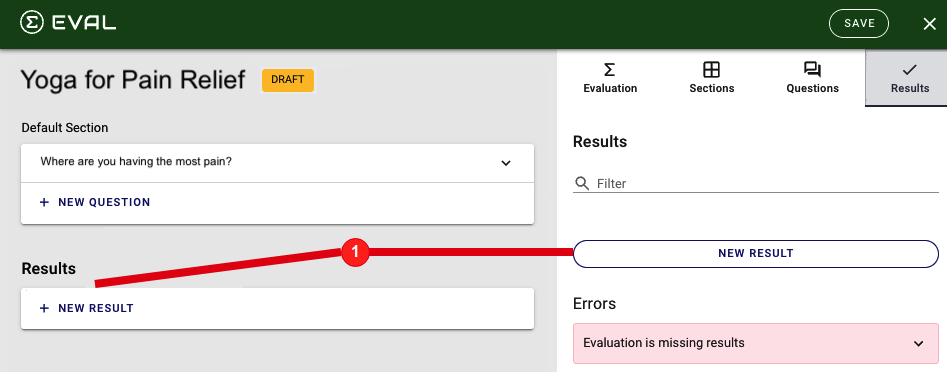
The Details Pane opens to the following:
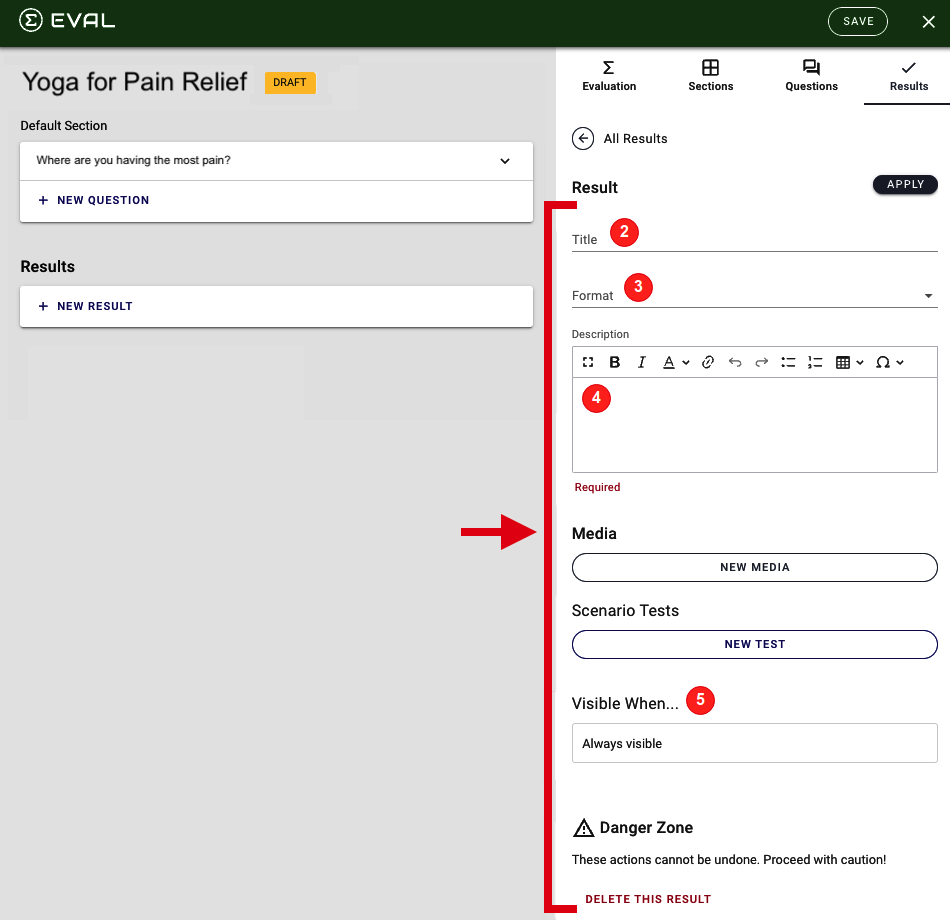
- Enter Title of Yoga Poses for Back Pain
- Choose Format of Information
- Provide any description (sample two screenshots below)
- In the Visible When section, click New Rule. The following displays:
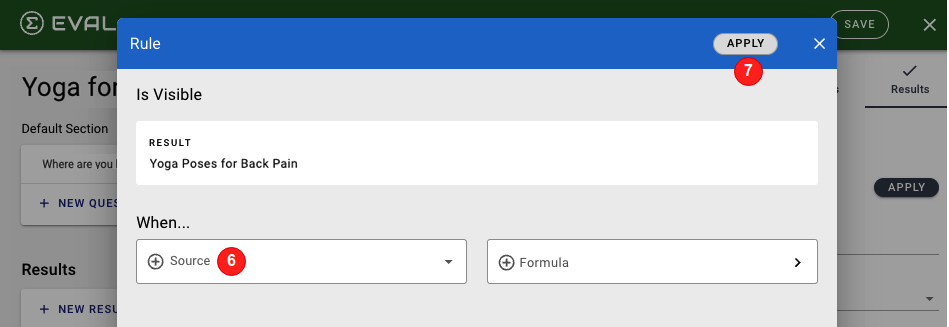
- Choose a Source of Back (This means that when "Back" is selected, the result of "Yoga Poses for Back Pain" will display.)
- Click Apply on the Rule popup.
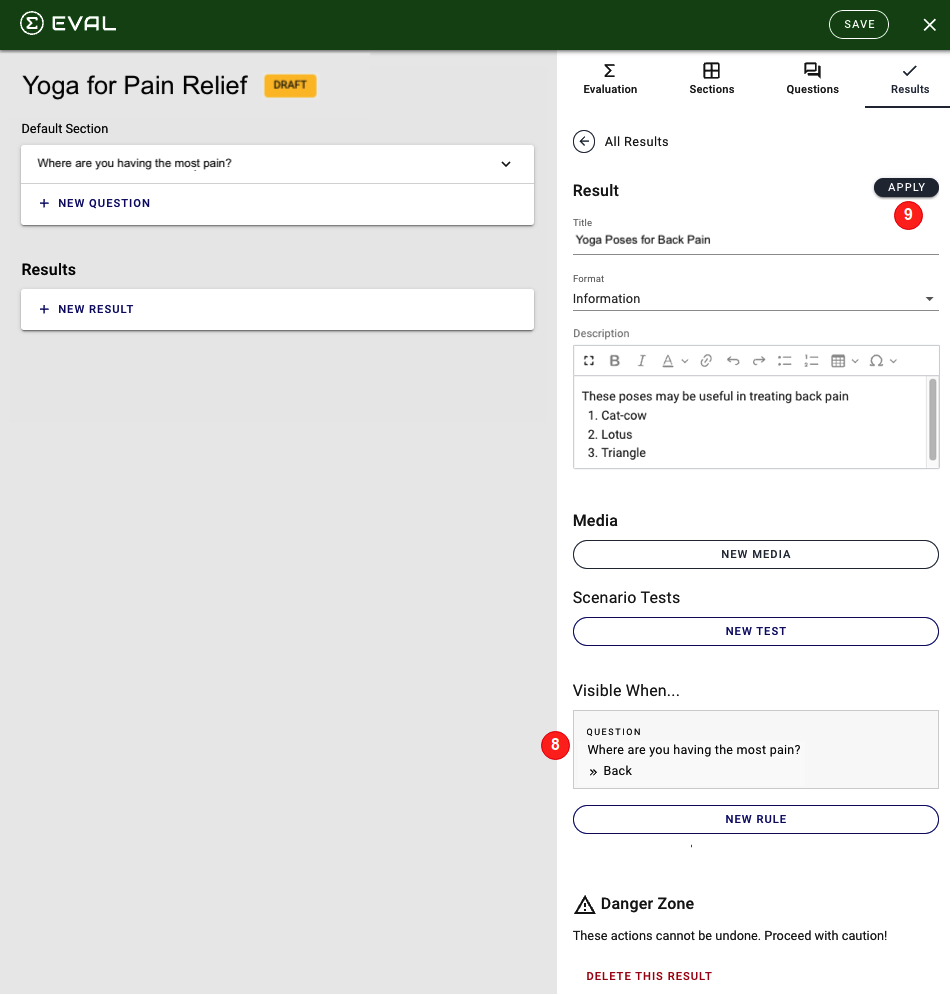
- The visibility rule has been saved and will display on the page
- Click Apply on the Results page
- Repeat steps 1-9 for the second result by populating the following:
- Enter Title of Yoga Poses for Neck Pain
- Choose Format of Information
- Provide any description
- When creating the visibility rule, choose a Source of Neck (This means that when "Neck" is selected, the result of "Yoga Poses for Neck Pain" will display.)
- Repeat steps 1-9 for the second result by populating the following:
- Enter Title of Yoga Poses for Neck Hip
- Choose Format of Information
- Provide any description
- When creating the visibility rule, choose a Source of Hip (This means that when "Hip" is selected, the result of "Yoga Poses for Hip Pain" will display.)
Your application should look like this:
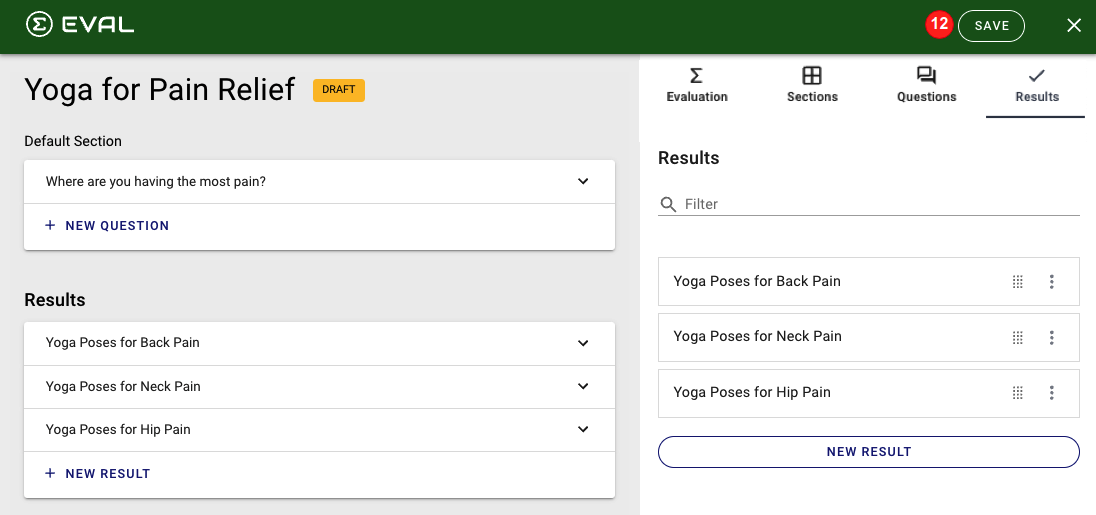
- Click Save in the green header to save your application.
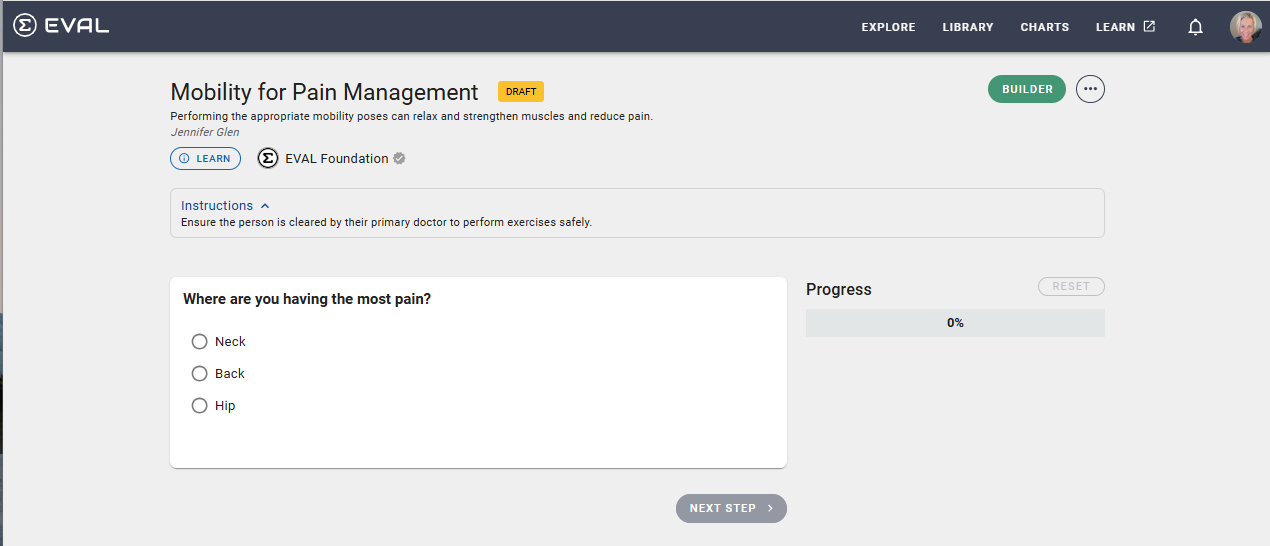
Congratulations! You've created your first application. You are now ready to run it.
Run Application
Click X in the green header to close your application and run it.
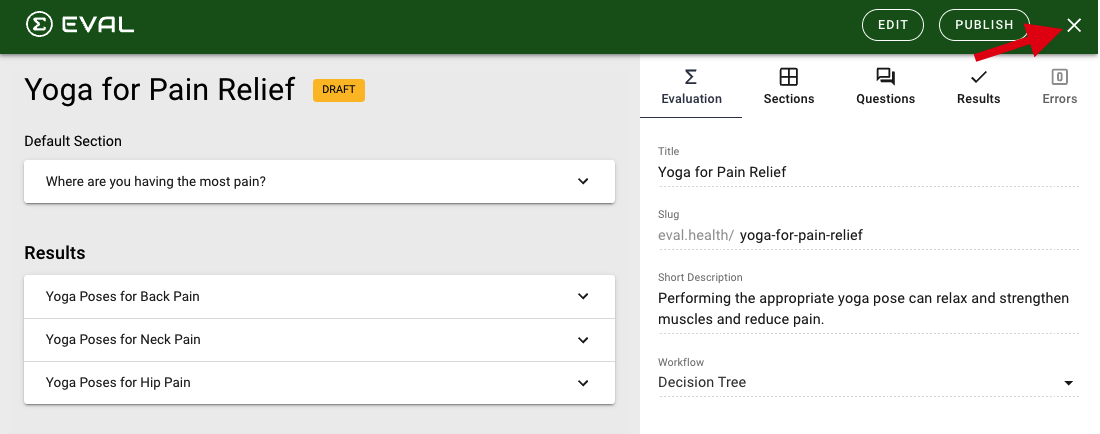
You will be returned back to your Library in "Player" mode for the application you just created.
Keep learning about all the additional features you can add to your application can do by checking out:
Updated about 1 year ago
